How to Cook NY Strip Steak Like a Pro: Tender, Juicy & Delicious
Table of Contents
How to Cook NY Strip Steak Like a Pro: Tender, Juicy and Delicious
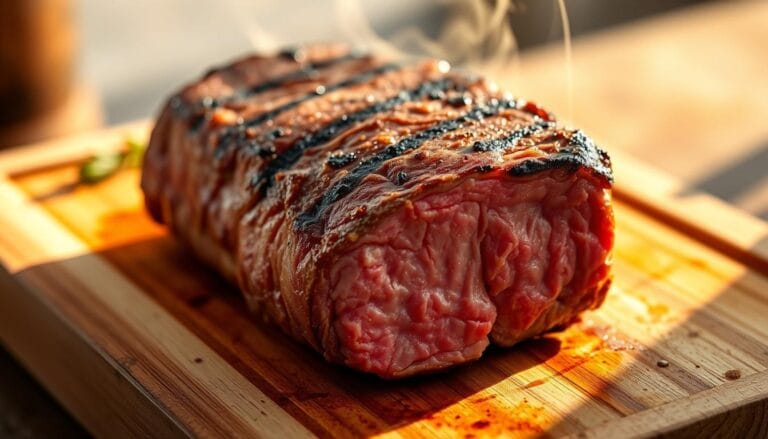
There’s nothing quite like the sizzle of a perfectly prepared cut hitting a hot surface. The aroma fills the air, your mouth waters, and for a moment, everything hinges on getting that first bite just right. Maybe you’ve felt that mix of excitement and pressure before—wanting to impress guests or simply treat yourself to a restaurant-quality meal at home.
Mastering this cut isn’t about luck. It’s about understanding heat control, timing, and the simple tricks chefs use daily. Whether you’re firing up the grill, using a cast-iron skillet, or finishing in the oven, the path to tender, juicy results is clearer than you think. And trust us—it doesn’t require fancy gadgets or years of training.
Let’s face it: a tough, overcooked steak can ruin the mood. But with the right guidance, you’ll avoid common pitfalls like uneven searing or losing those precious juices. This guide walks you through each step, from selecting the best marbling to letting the meat rest properly. Ready to transform your kitchen into a steakhouse?
Key Takeaways
- Choose a cut with visible marbling for maximum flavor and tenderness
- Always preheat your cooking surface to achieve a perfect crust
- Use coarse salt and fresh-cracked pepper for balanced seasoning
- Let the steak rest for 5-7 minutes after cooking to redistribute juices
- Invest in a meat thermometer for precise doneness control
Understanding NY Strip Steak: A Brief Overview
The New York Strip Steak is known for its premium cut status. It has a bold flavor and a chewy texture. Cut from the short loin, it’s between the tender filet mignon and the rich ribeye.
This spot gives it a perfect balance of taste and texture. It’s great for grilling or pan-searing.
What Makes NY Strip Steak Unique?
Three things make this cut special. First, its moderate marbling adds flavor without being too rich. Second, the spinalis dorsi muscle along the edge gets crispy and caramelized when cooked. Third, its thickness of 1-1.5 inches is perfect for a sear and a juicy center.
Compared to a ribeye, the NY strip has 25-30% less fat. This makes it meatier. Unlike sirloin, it has more fat to prevent dryness when cooked at high heat. This balance is why it’s a favorite in steakhouses.
Cuts and Texture Explained
Butchers divide the NY strip into two types:
- Bone-in: Adds extra flavor during cooking (sometimes called “Kansas City Strip”)
- Boneless: Preferred for even cooking and easier slicing
The meat’s tight grain makes it tender but substantial. Cooking it to medium-rare (130-135°F) makes it buttery chew without being mushy.
| Cut | Marbling | Tenderness | Best Cooking Method |
|---|---|---|---|
| NY Strip | Moderate | Firm but tender | Grilling, pan-searing |
| Ribeye | Heavy | Very tender | Reverse sear, sous vide |
| Sirloin | Light | Chewy | Marinating, slow cooking |
This comparison shows why the NY strip is great for quick cooking. Its structure prevents overcooking, making it a top choice for home chefs learning to cook steak.
Selecting the Perfect NY Strip Steak
Finding the perfect NY Strip steak is more than just cooking. It’s about choosing the right cut. This choice affects the steak’s flavor, tenderness, and juiciness. Knowing what to look for is key.
Choosing Quality Meat at the Grocery Store
Marbling is your best friend when picking NY Strip steaks. The white streaks of fat melt during cooking, making the steak juicy. Steer clear of steaks with big fat pockets or color changes. Fresh steaks should have a bright red color and creamy-white fat.
Steak thickness is important. Look for 1–1.5 inches thick steaks. This thickness helps get a good sear without overcooking. The fat cap on the steak adds flavor and protects it during cooking.
Understanding USDA Grading
The USDA grading system helps you find top-quality steaks. Here’s what those labels really mean for your steak:
| Grade | Marbling Level | Best For |
|---|---|---|
| Prime | Abundant | Grilling, special occasions |
| Choice | Moderate | Everyday cooking |
| Select | Minimal | Marinating or budget meals |
Prime steaks are rich, but Choice is a better value for most cooks. Select grades are good for bold marinades or thin slices for stir-fries.
Preparing Your NY Strip Steak for Cooking
The secret to a delicious NY strip steak is in the prep work before cooking. Proper preparation ensures even cooking and maximizes flavor. It also helps create the perfect crust-to-juiciness ratio. Let’s explore the key steps.
Essential Ingredients for Flavor
For a great steak, keep it simple. Focus on these three ingredients:
| Ingredient | Purpose | Pro Tip |
|---|---|---|
| Kosher salt | Enhances natural meat flavors | Apply 1 hour before cooking |
| Black pepper | Adds earthy warmth | Coarse grind works best |
| Olive oil | Promotes caramelization | Use high smoke-point varieties |
Steer clear of pre-seasoning blends with additives. They can mask the steak’s natural taste. For more flavor, add garlic powder or rosemary after searing.
Room Temperature: Why It Matters
Cold steak cooks unevenly. The center stays raw while the outside gets overcooked. Letting it rest for 30-45 minutes helps:
- Faster, more consistent heat penetration
- Reduced risk of toughness
- Better rendering of fat marbling
Pro tip: Pat the steak dry with paper towels before seasoning. This helps with browning. Always cook raw meat within 2 hours for food safety.
Different Cooking Methods for NY Strip Steak
Your choice of cooking method greatly affects the steak’s taste and texture. Whether you want smoky grill marks or a rich stovetop sear, each method has its own benefits. Let’s explore three reliable ways to cook this cut perfectly.
Grilling: The Classic Method
Charcoal grills add a deep smoky flavor, while gas grills offer better temperature control. Heat your grill to 450-500°F for the best sear. Place the steak at an angle to get those nice crosshatch marks.
Cook for 4-5 minutes on each side for a medium-rare steak (130-135°F internal temperature). Use tongs to flip the steak, avoiding piercing it. For thicker steaks, move them to indirect heat after searing to finish cooking.
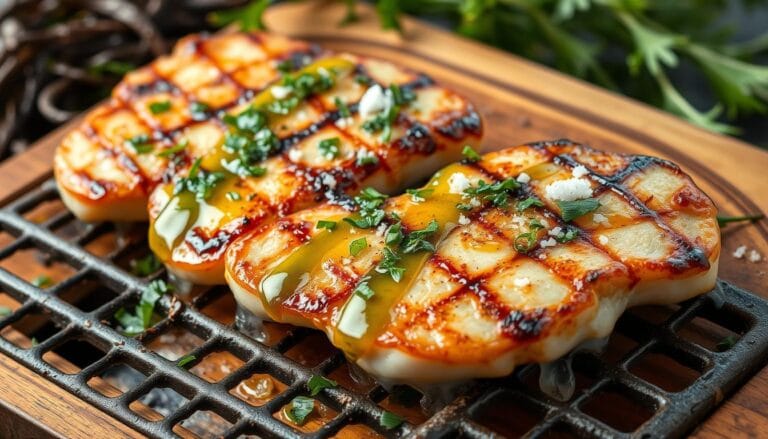
Pan-Searing: Quick and Delicious
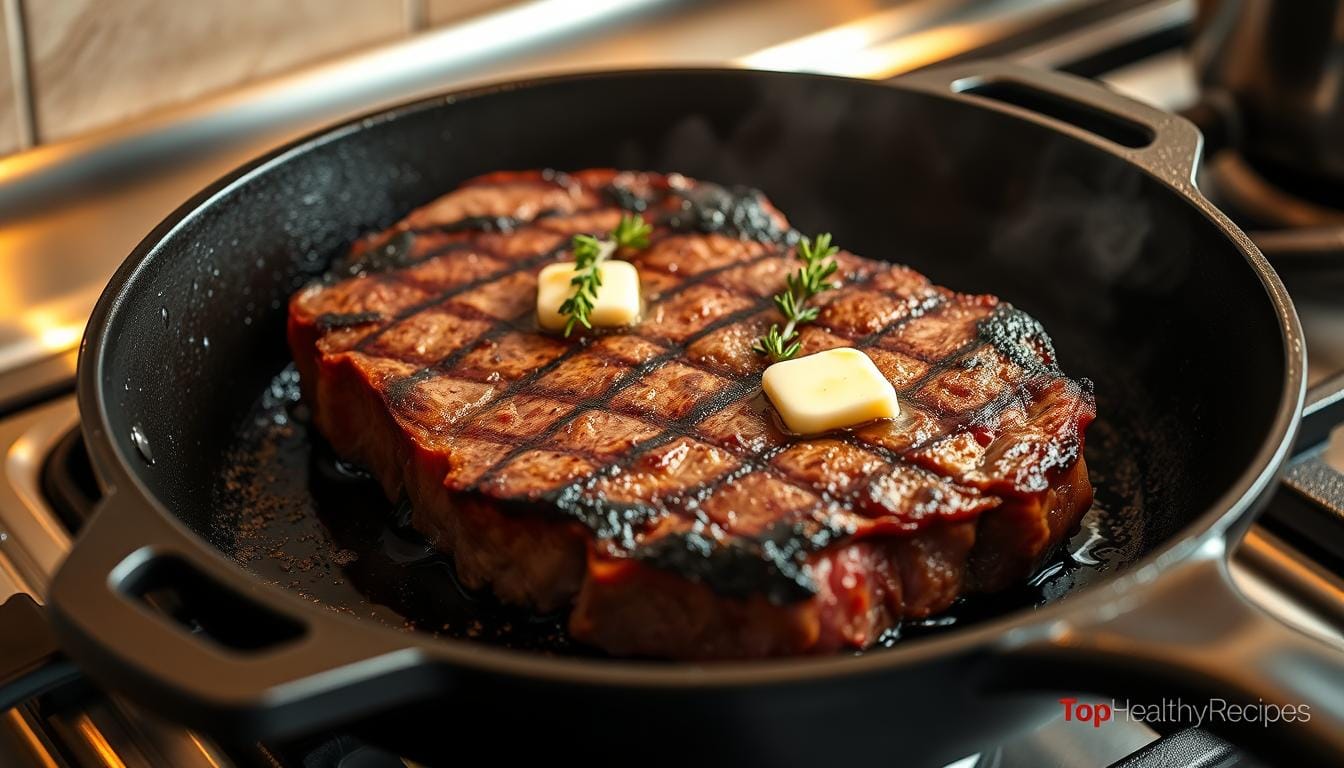
A cast-iron skillet is ideal for pan-searing. Heat it over medium-high until it’s almost smoking. Pat the steak dry before placing it in the pan. You’ll hear that great sizzle right away.
Sear the steak without moving it for 3 minutes to create a crust. Flip it and add butter, garlic, and herbs. Baste it constantly for 2-3 minutes. This method is perfect for 1-1.5″ thick steaks, without needing to finish in the oven.
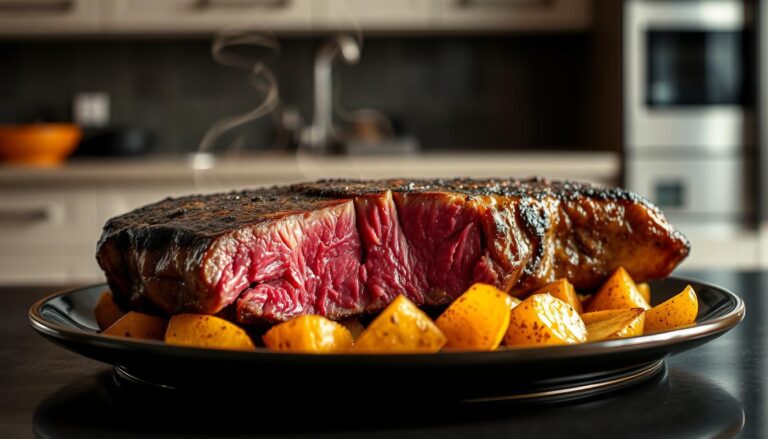
Oven Roasting: A Foolproof Alternative
Reverse searing is great for thicker cuts. Start by cooking the steak in a 275°F oven until it reaches 110°F (about 20-25 minutes). Then, finish it in a hot skillet for 60 seconds on each side.
This slow cooking method ensures even cooking from edge to center. Use a wire rack on your baking sheet to improve air circulation. Serve with roasted vegetables for a complete meal.
Essential Tools for Cooking NY Strip Steak
The secret to a perfect NY strip steak is in your tools and technique. The right equipment helps cook evenly, creates a caramelized crust, and keeps the steak juicy. Let’s explore the essential gear for a steakhouse-quality steak.
Must-Have Cooking Utensils
Meat thermometers are key to avoid guessing the steak’s temperature. Models like Thermapen® give quick results in 2-3 seconds. Use stainless steel tongs to flip the steak without piercing it.
A stiff-bristled grill brush keeps grates clean for better sear marks and prevents flare-ups. For pan cooking, a basting spoon helps coat the steak in melted butter or herbs. Heat-resistant gloves are essential for handling hot cast-iron cookware.
Recommended Cookware
Cast-iron skillets are the best for achieving a restaurant-quality crust. They retain heat well, allowing for high-temperature searing without hot spots. Heavy-bottomed stainless steel pans are great for butter basting, and grill pans create authentic char marks indoors.
| Cookware Type | Best For | Heat Retention | Maintenance |
|---|---|---|---|
| Cast-Iron Skillet | Searing, oven finishes | Excellent | Season regularly |
| Grill Pan | Indoor char marks | Good | Easy clean-up |
| Stainless Steel Pan | Butter basting | Moderate | Dishwasher safe |
For outdoor grilling, replace worn grill grates every year for even heat. Enameled Dutch ovens are versatile for reverse-searing thicker cuts. Quality cookware lasts decades, making it a worthwhile investment for high-heat steak prep.
Seasoning Your NY Strip Steak
Getting the most out of your New York strip steak begins before cooking. The right seasoning brings out the meat’s natural flavors without hiding its quality. Whether you like simple or bold tastes, getting this right makes every bite a delight.
Simple Seasoning Techniques
Salt is essential for bringing out the steak’s rich flavors. Sprinkle kosher salt on both sides 40 minutes before cooking. This lets the salt penetrate the meat, making it taste better.
Just before cooking, add black pepper to avoid burning. For a unique touch, try smoked paprika or garlic powder. Remember, a great steak needs just these basics to impress.
Marinades: Adding Flavor Depth
Marinades add a lot to your New York strip steak. Mix olive oil, minced garlic, rosemary, and balsamic vinegar for a tasty blend. Acidic ingredients like lemon juice tenderize the meat, while herbs add a nice aroma.
Marinate for 30 minutes to 2 hours. Marinating too long can make the meat soft. Always dry the steak before cooking for a perfect sear.
Cooking Times and Techniques
To get a perfect NY Strip Steak, focus on two key steps: checking the temperature and letting it rest. These steps help keep your steak tender and full of flavor. Let’s explore how to do both like a pro.
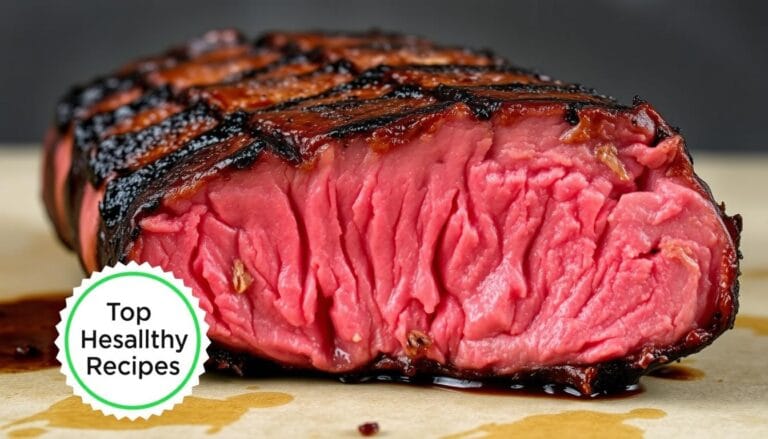
Finding the Right Internal Temperature
Use a meat thermometer to keep an eye on your steak’s temperature. Take it off the heat 5°F before your desired doneness because it will cook a bit more as it rests. Here’s what you need to know:
| Doneness | Internal Temp (°F) | Description |
|---|---|---|
| Rare | 120–125 | Cool red center, ultra-juicy |
| Medium Rare | 130–135 | Warm red center, ideal texture |
| Medium | 140–145 | Pink throughout, balanced firmness |
| Well-Done | 150+ | Little to no pink, fully cooked |
Pro tip: Carryover cooking adds about 5°F as proteins relax. For medium-rare, pull the steak at 130°F – it’ll reach 135°F while resting.
Resting: The Key to Juiciness
Let your steak rest for 5–10 minutes after cooking. This lets the juices redistribute, making it juicier. Cover it loosely with foil to keep it warm without trapping steam.
Cutting too soon? You’ll lose up to 40% of the moisture. Wait until it’s fully cooled, then slice against the grain for maximum tenderness. You’ll get a steak that’s juicy all the way through.
Tips for Achieving Perfect Steak Sear
A crisp, caramelized crust makes your NY strip steak truly special. To get it right, you need to focus on heat, timing, and some expert tips. Let’s explore how to keep the steak juicy and the texture just right.
Preheating Your Cooking Surface
Your pan or grill must be scorching hot before adding the steak. This high heat starts the Maillard reaction, which adds flavor and color. Use cast iron, stainless steel, or a grill grate for even heat.
Test if it’s ready by sprinkling water droplets. If they sizzle and disappear fast, you’re good to go.
Use oils like avocado or grapeseed because they can handle high heat. Lightly coat the steak, not the pan, to avoid burning. Cooking one steak at a time keeps the temperature up. Or, use multiple pans if needed.
Searing: Timing and Techniques
Place the steak in the pan gently and don’t move it for 2-3 minutes. This helps build the crust. Don’t press down on the steak to avoid losing juices. Flip it once with tongs, not a fork.
For thicker cuts, sear the edges briefly by holding the steak upright with tongs. Finish with a butter baste for extra flavor. Tilt the pan, spoon melted butter over the steak, and add herbs like rosemary. Let it rest 5-8 minutes to let the juices spread evenly.
“A perfect sear isn’t rushed—it’s a balance of patience and high heat.”
Enhancing Flavor with Toppings and Sauces
Make your NY strip steak unforgettable with creative toppings and sauces. These add-ons bring out the meat’s natural richness. They also add texture and flavor. Choose from classic pairings or bold experiments to take your steak to the next level.

Garlic Butter: A Classic Addition
Garlic butter is a timeless choice that melts into every bite. Mix softened butter with minced garlic, chopped parsley, and a pinch of salt. Spread it on your steak after cooking for a glossy finish.
Try this easy recipe:
- ½ cup unsalted butter (room temperature)
- 3 cloves garlic, finely minced
- 1 tbsp fresh thyme
- 1 tsp cracked black pepper
Combine ingredients and refrigerate for 30 minutes before use. Add a squeeze of lemon juice for an extra kick.
Experimenting With Compound Butters
Compound butters let you customize flavors. Blue cheese butter is perfect with steak—just blend crumbled blue cheese into softened butter with chives. Shape it into a log, then slice chilled discs onto hot steak.
Other crowd-pleasing variations:
- Herb Butter: Rosemary, sage, and lemon zest
- Spicy Chili Butter: Red pepper flakes and smoked paprika
- Truffle Butter: Black truffle oil and grated Parmesan
Don’t shy away from sauces like chimichurri or a red wine reduction. A tangy chimichurri cuts through the steak’s richness. A silky reduction adds depth. Drizzle them lightly to avoid overpowering the meat’s natural flavor.
Serving Your NY Strip Steak: Presentation Ideas
A beautifully presented steak makes your meal special. Thoughtful plating and sides create a delightful experience. Let’s see how to present your NY strip like a chef and balance flavors.
Plating Tips for a Restaurant-Style Finish
Begin by slicing your steak against the grain at a slight angle. Place the slices in a fan shape or overlapping pattern on a warm white plate. This highlights the steak’s juicy interior.
- Fresh thyme or rosemary sprigs placed casually beside the meat
- A pinch of flaky sea salt scattered over the sliced edges
- A drizzle of red wine reduction in artistic swirls
Keep sauces under the steak or in small ramekins to keep the crust intact. Use negative space wisely – too much on the plate can lose its appeal.
Side Dishes That Complement Steak
Choose sides that balance the richness of the steak without overpowering it. These are great choices:
- Roasted asparagus with lemon zest (adds bright acidity)
- Truffle fries (brings earthy crunch)
- Loaded baked potato (offers creamy texture contrast)
For lighter options, try a kale Caesar salad or blistered cherry tomatoes. Always serve sides in smaller portions than the steak. They should enhance, not overshadow, the main dish.
Leftovers: Storing and Reheating
Don’t let your perfectly cooked NY strip steak go to waste. Learn these storage and reheating tricks to keep it tender and flavorful. Proper handling ensures leftovers stay juicy and opens up creative meal options.
How to Properly Store Cooked Steak
Cool your steak to room temperature within 2 hours of cooking. Wrap it tightly in aluminum foil or place it in an airtight container to prevent drying. For best results:
- Refrigerate for up to 4 days
- Freeze in a freezer-safe bag for 3 months (label with the date)
Never leave steak at room temperature overnight. Use a vacuum sealer for freezing to block freezer burn and preserve texture.
Creative Ways to Use Leftover NY Strip Steak
Turn yesterday’s dinner into today’s culinary adventure. Leftover steak adds protein-rich flair to quick meals. Try these ideas:
| Dish | Prep Time | Key Ingredients |
|---|---|---|
| Steak Salad | 10 mins | Mixed greens, cherry tomatoes, balsamic dressing |
| Breakfast Hash | 15 mins | Diced potatoes, onions, fried eggs |
| Steak Tacos | 12 mins | Corn tortillas, avocado, lime crema |
Slice steak thinly for sandwiches or cube it for omelets. Reheat gently in a skillet with butter to avoid toughness. For stir-fries, add steak last to maintain its texture.
Troubleshooting Common Cooking Issues
Don’t let cooking mishaps ruin your steak experience. Even small errors can impact your NY strip’s texture and flavor. Below, we’ll tackle two frequent challenges—overcooking and toughness—with practical solutions to save your meal.

Overcooked Steak: How to Avoid It
Prevention beats correction every time. Use these strategies to keep your steak juicy:
- Track time religiously: Set a timer for each cooking stage.
- Invest in a meat thermometer: Remove steak at 125°F for medium-rare.
- Rest the meat: Let it sit 5-7 minutes before slicing.
If your steak is already overdone, try these salvage techniques:
| Problem | Quick Fix | Best Use Case |
|---|---|---|
| Dry texture | Drizzle with garlic herb butter | Immediate serving |
| Lack of moisture | Slice thin for steak sandwiches | Next-day lunches |
| Chewy consistency | Chop for stir-fries or tacos | Reinventing leftovers |
“A good pan sauce can resurrect even the driest steak. Combine drippings, broth, and a splash of wine for instant moisture.”
What to Do if the Steak is Too Tough
Tough NY strip often results from underdeveloped connective tissue. Try these methods to improve texture:
- Slice against the grain: Cut perpendicular to muscle fibers
- Marinate in acidic liquids: Use lemon juice or vinegar for 30+ minutes
- Mechanical tenderizing: Gently pound with a meat mallet
Conclusion: Perfecting Your NY Strip Steak Skills
Mastering NY strip steak is about mixing skill with creativity. Begin with top-notch meat, the right prep, and exact cooking methods like grilling or pan-searing. Remember, letting your steak rest after cooking is key. It keeps the juices inside for the best taste.
Recap of Key Takeaways
Opt for steaks 1-1.5 inches thick for even cooking. Dry the surface before seasoning for a crispy crust. Use a meat thermometer to check doneness: 120°F for rare, 125°F for medium-rare, or 135°F for medium. Let the steak rest 5-7 minutes before slicing.
Encouragement to Experiment and Enjoy
Try new cooking methods or flavors like herb-infused oils or smoked salts. Pair your steak with unique sides, like shrimp and steak for a surf-and-turf twist. Experiment with seasoning blends or reverse-searing for a deeper crust.
Keep improving based on your results. Track cooking temperatures, sear times, and resting periods. With time, you’ll make NY strip steaks as good as those in restaurants.
FAQ
What’s the best way to cook a NY strip steak on the stove?
How do I grill a NY strip steak without drying it out?
Can I cook a NY strip steak in the oven?
What’s the ideal thickness for a NY strip steak?
How do I know when my NY strip steak is done?
Why is my NY strip steak tough?
Should I marinate a NY strip steak?
What’s the best oil for searing a NY strip steak?
How do I store and reheat leftover NY strip steak?
What sides pair well with NY strip steak?
For more cooking tips, stay connected with us. We also recommend the cookbook Skinnytaste Simple: Easy, Healthy Recipes with 7 Ingredients or Fewer
For more Recipes about Steak ?
Did You try our recipe ?
There are no reviews yet. Be the first one to write one.