How to Dry Age Beef at Home for Incredible Flavor and Tenderness
Table of Contents
How to Dry Age Beef at Home for Incredible Flavor and Tenderness
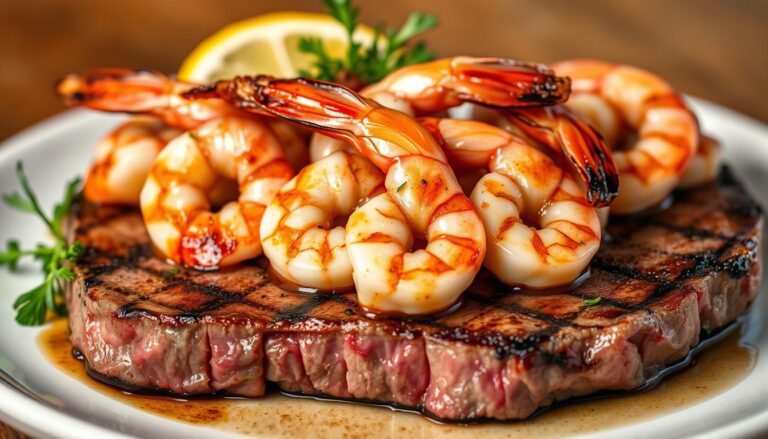
Imagine enjoying a perfectly cooked steak. It’s tender and has a rich flavor that’s rare in regular cuts. Dry aging beef turns raw meat into a culinary masterpiece. It’s gaining popularity among home cooks and food lovers.
Learning how to dry age beef can take your cooking to new levels. You can get restaurant-quality results right in your kitchen. This guide will cover the basics, techniques, and tools needed to age beef at home.
Key Takeaways
- Understand the basics of dry aging and its benefits
- Learn the essential equipment required for dry aging beef
- Discover practical tips for achieving optimal results
- Explore advanced techniques to refine your aging process
- Achieve restaurant-quality beef in the comfort of your own kitchen
What is Dry Aging and Why Do It?
Dry aging beef is an old technique that makes meat taste better and feel softer. It’s loved by chefs and food lovers. When you dry age beef, it goes through changes that make its flavor stronger and its texture softer.
To dry age beef, you need to control the environment. This includes keeping an eye on temperature, humidity, and air flow. This careful control helps the meat age well and safely.
The Science Behind Dry Aging
The science of dry aging is about how meat changes as it ages. Enzymes in the meat break down proteins and fats. This makes the meat tender and its flavors more complex.
As Patrick McFarland, a renowned butcher, said, “The art of dry aging is about creating an environment where the natural enzymes can do their work, making the beef better.” This shows how important it is to understand and control the aging process.
“The art of dry aging is about creating an environment where the natural enzymes can do their work, making the beef better.” – Patrick McFarland
Flavor Development
Flavor is key in dry aging. As the beef ages, fats and proteins break down. This creates new flavors like nutty, earthy, and funky ones. These flavors are loved by many.
The table below shows how aging time changes the flavor of dry-aged beef:
| Aging Period | Flavor Profile |
|---|---|
| 14-21 days | Mild, slightly sweet |
| 28-35 days | Rich, beefy, with earthy notes |
| 45+ days | Complex, intense, with pronounced funk |
Texture Improvement
Dry aging also makes meat softer. Enzymes break down connective tissues, making it tender. As moisture evaporates, the meat becomes more concentrated, making each bite better.
To get these results, you need to know how to age meat right. This includes keeping the right conditions during aging. When done right, dry aging can make your dishes more flavorful and tender than fresh beef.
The Historical Significance of Dry Aging
Dry aging beef has a long history, changing from a need to a beloved cooking art. Knowing this history helps us see how dry aging techniques and traditions have grown.
Early Practices in Butchery
Butchers used dry aging before refrigerators existed. They controlled the environment to slow down meat spoilage. This early method is the base for today’s dry aging.
Butchers learned to pick the right meat cuts for aging. This skill is key in how to dry age meat well. Over time, butchers got better at aging, with each region adding its own twist.
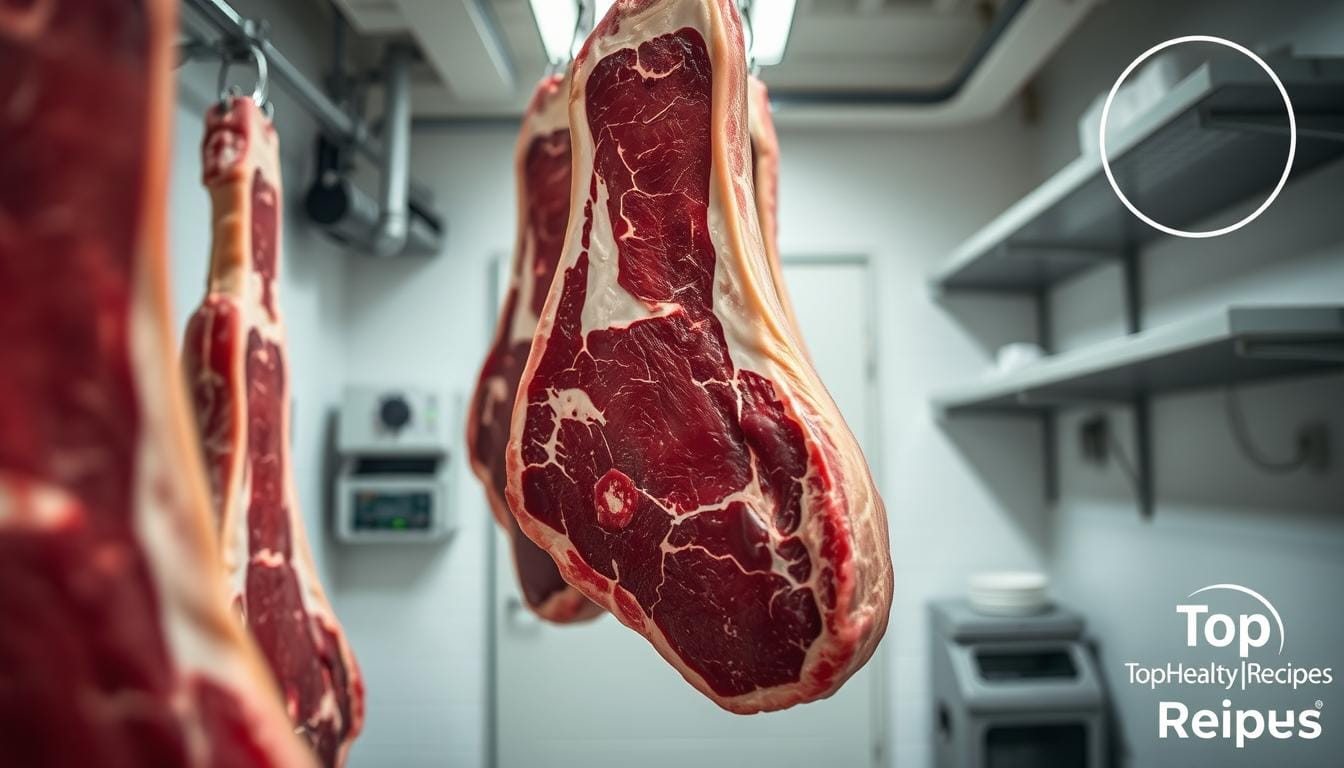
Cultural Variations in Aging Beef
Dry aging has been shaped by many cultures. In Europe, butchers have hung beef for ages, creating special flavors. In Asia, unique aging methods use local ingredients for distinct tastes.
These differences show dry aging’s flexibility. Exploring these methods can improve your how to age meat skills.
Understanding dry aging’s history and cultural impacts helps us appreciate its complexity. This knowledge helps when aging beef at home or choosing aged products.
Choosing the Right Cut of Beef for Dry Aging
To get the best results from dry aging, picking the right cut of beef is key. The cut you choose affects the flavor, tenderness, and quality of the final product. Knowing how different cuts respond to dry aging is important for success.
Popular Cuts Recommended for Aging
Some cuts of beef are better for dry aging because of their fat content and muscle structure. The ribeye, strip loin, and sirloin are popular choices. These cuts have marbling, which adds flavor and tenderness.
Ribeye is tender and flavorful because of its marbling. The strip loin offers a good balance of tenderness and flavor. The sirloin is leaner but develops strong flavors during aging.
Factors Affecting Aging Quality
Several things impact the quality of dry-aged beef. Marbling, fat cap, and the meat’s initial quality are important. Marbling makes the beef tender and flavorful. A fat cap helps protect the meat from drying out too much.
The meat quality at the start is also critical. Better quality meat usually ages better. Things like the cattle breed, diet, and handling affect the final quality.
Grass-Fed vs. Grain-Fed Beef
Grass-fed and grain-fed beef differ in dry aging and flavor. Grass-fed beef is leaner and may have a stronger beef flavor. Grain-fed beef is often more marbled, leading to a tender and richer taste.
Here’s a comparison of popular cuts for dry aging:
| Cut | Marbling Level | Flavor Profile | Tenderness |
|---|---|---|---|
| Ribeye | High | Rich, Beefy | Very Tender |
| Strip Loin | Moderate | Balanced | Tender |
| Sirloin | Low to Moderate | Robust | Moderately Tender |
By considering these factors and choosing the right cut, you can improve your dry aging results. This will lead to a more flavorful and tender final product.
Equipment You Need for Dry Aging
To dry age beef at home, you need the right tools. A controlled environment is key to prevent spoilage. It also helps in developing good mold and flavor.
Dry Aging Fridges and Their Features
A dedicated dry aging fridge is best for aging beef. These fridges control temperature and humidity well. Look for these features when choosing a fridge:
- Precise Temperature Control: Set the temperature between 34°F to 39°F (1°C to 4°C).
- Humidity Control: Keep humidity at 30% to 50% for dry aging.
- Air Circulation: Circulate air evenly for consistent aging.
Some fridges also have UV lighting to control mold. They also have digital controls for easy monitoring.
Alternative Aging Options
If a dedicated fridge is not possible, there are other ways. You can modify a regular fridge to mimic a dry aging fridge. UMAi Dry Age bags are another good option for aging in a standard fridge.
Other alternatives include:
- Convert a spare fridge or freezer into a dry aging chamber with controls.
- Use a climate-controlled wine cellar for aging.
Temperature and Humidity Controls
Keeping temperature and humidity steady is key for dry aging. You can use:
- Thermometers and Hygrometers: Devices for accurate monitoring.
- Temperature and Humidity Controllers: Electronic devices for regulating the environment.
By controlling these factors, your beef will age well. It will develop the complex flavors and tender texture of dry-aged beef.
The Dry Aging Process Explained
Creating exceptional dry-aged beef starts with understanding the aging process. It’s a complex method that turns raw beef into tender, flavorful meat. This is done by controlling the environment and time carefully.
Preparation Steps Before Aging
Before starting, you must prepare your equipment and beef. Sanitizing your equipment is the first step to avoid contamination. Make sure your aging fridge or environment is clean and at the right temperature and humidity.
Then, trimming and preparing your beef is key. Choose the right cut and trim it to remove excess fat. This prevents off-flavors during aging.
Duration of Aging
The aging time varies based on your desired flavor and tenderness. For a light enhancement, age your beef for 14-21 days. For a stronger flavor, age it for 45 days or more.
“The longer you age beef, the more intense the flavor becomes, but it requires careful monitoring to avoid spoilage.”
Monitoring the Aging Process
Regular checks are vital for proper and safe aging. Look for a dry, tacky surface and watch for mold or excessive drying. Adjust your environment as needed to keep conditions optimal.
- Check for mold growth and ensure it’s within safe limits.
- Monitor the beef’s texture and appearance.
- Adjust temperature and humidity levels as needed.
By following these steps and understanding the dry aging process, you can make high-quality, flavorful dry-aged beef at home.
Setting Up Your Dry Aging Environment
Dry aging beef needs a controlled space for quality and safety. You must focus on several key factors.
Ideal Temperature and Humidity Levels
The right temperature and humidity are vital for dry aging. Keep the temperature between 34°F and 38°F. Humidity should be 75% to 85%.
This environment slows aging, dries evenly, and stops bacteria growth.
| Parameter | Ideal Range |
|---|---|
| Temperature | 34°F – 38°F |
| Humidity | 75% – 85% |
Airflow Considerations
Good airflow is key for even aging and to stop moisture buildup. Make sure air circulates well around the meat. Don’t overcrowd the space and use fans if needed.
Key Airflow Considerations:
- Ensure adequate space between meat portions
- Use fans to enhance air circulation if needed
- Monitor for any signs of uneven drying or moisture accumulation
Preventing Contamination
Keeping the meat clean is vital for safety. Clean the aging area and tools often. Also, handle the meat carefully to avoid contamination.
Best Practices for Preventing Contamination:
- Regularly clean and sanitize the aging fridge and equipment
- Handle meat with clean utensils and gloves
- Monitor the aging meat for any signs of spoilage

The Role of Mold in Dry Aging
Mold in dry aging is a double-edged sword. It can make the meat taste better or spoil it, depending on the type. As you age beef, mold naturally grows on the surface. It plays a key role in the aging process.
Mold helps create the unique flavor of dry-aged beef. It breaks down proteins and fats through enzymatic activity. This tenderizes the meat and makes it taste more umami, a favorite among chefs and meat lovers.
How Mold Affects Flavor
The mold on dry-aged beef gives it its special taste. As it breaks down proteins and fats, it creates compounds that add to the beef’s complex flavor. Beneficial mold makes the beef taste more savory and aromatic.
- Mold enzymes break down proteins into amino acids, which are the building blocks of flavor.
- The fat breakdown by mold results in the formation of fatty acids, contributing to the beef’s overall flavor profile.
Safe Mold vs. Harmful Mold
Not all mold is good; some is harmful. Beneficial mold is white or powdery and is encouraged in dry aging. Harmful mold, on the other hand, is green, black, or slimy and means the meat is contaminated.
To ensure safe dry aging, it’s important to know the difference between these molds. Here are the main differences:
| Mold Type | Appearance | Impact |
|---|---|---|
| Beneficial | White, powdery | Enhances flavor, tenderizes meat |
| Harmful | Green, black, slimy | Indicates contamination, potentially harmful |
Understanding mold’s role in dry aging and knowing how to spot safe versus harmful mold is key. This way, you can age beef at home like a pro. Mastering dry aging unlocks new flavors and textures that take your cooking to the next level.
Common Mistakes to Avoid When Dry Aging
Trying to dry age beef at home can be tricky. It needs precision, patience, and a good understanding of the process. Knowing the common mistakes can help you succeed.
Temperature Control Oversights
Keeping the right temperature is key when dry aging beef. Fluctuations can cause problems, like harmful bacteria growth. Consistent refrigeration between 34°F and 38°F (1°C and 3°C) is vital. A dedicated dry aging fridge with precise controls can help.
The Importance of Meat Quality
Choosing the right cut of beef is essential. High-quality, fresh meat is necessary for a safe and flavorful final product. Consider the meat’s breed, feed, and aging ability. A low-quality cut won’t improve with aging.
Maintaining Cleanliness
Cleanliness is critical during dry aging. Maintain a clean environment for your meat. Sanitize your equipment, ensure good airflow, and watch for mold or bacteria.
| Common Mistake | Consequence | Prevention |
|---|---|---|
| Overlooking Temperature Control | Growth of harmful bacteria, spoilage | Use a dedicated dry aging fridge, monitor temperature |
| Selecting Poor Quality Meat | Subpar final product, possible food safety issues | Choose high-quality, fresh meat, consider breed and feed |
| Ignoring Cleanliness | Contamination, spoilage | Maintain a clean environment, sanitize equipment, ensure good airflow |
How to Cut and Prepare Dry Aged Beef
Now that your beef is dry aged, it’s time to cut and prepare it right. This ensures the best flavor and texture. The right preparation brings out the unique taste developed during aging.
Recommended Cutting Techniques
Cutting dry aged beef needs precision. This maximizes the meat you can use while removing the tough outer crust. The crust, or pellicle, is too hard to eat and is usually cut off.
Trimming the Pellicle: Start by carefully cutting off the pellicle. Use a sharp knife to remove the outer layer. Be careful not to cut too much of the meat underneath.
Portioning: After removing the pellicle, you can cut the beef into steaks or roasts. The aging time and cut type will affect the best size and style. For example, a dry aged ribeye might be cut into thick steaks, while a strip loin into thinner slices.
- For short-aged cuts (14-21 days), portioning into steaks is common.
- For longer-aged cuts (28 days or more), consider the balance between flavor intensity and tenderness when deciding on portion sizes.
Best Cooking Methods for Aged Beef
Dry aged beef needs special cooking methods. Its intense flavor and tender texture require adjusted cooking techniques. Knowing the best ways to cook can make your meal even better.
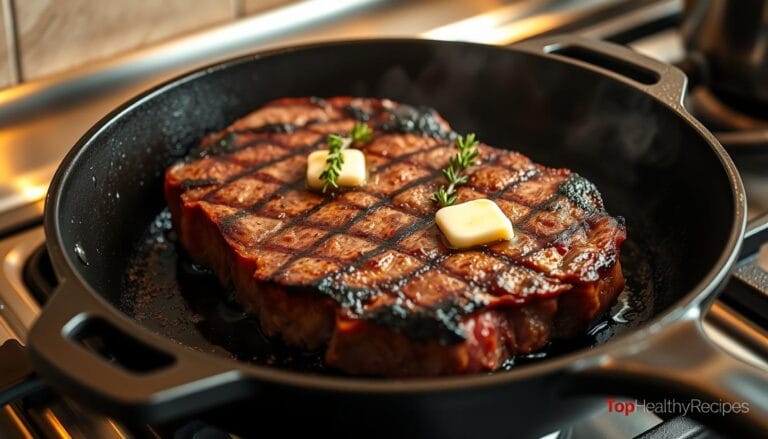
Cooking Techniques: High-heat cooking like grilling or pan-searing works well for dry aged beef. These methods create a nice crust on the outside while keeping the inside juicy.
Temperature Adjustments: Adjust cooking temperatures and times based on the cut’s thickness and desired doneness. A meat thermometer is key to cooking the beef to the perfect internal temperature.
- Preheat your grill or skillet to high heat.
- Sear the dry aged beef for 1-2 minutes per side to form a crust.
- Finish cooking to your desired level of doneness, using a thermometer to check internal temperatures.
Cooking with Dry Aged Beef
When you’re ready to cook your dry-aged beef, think about the best ways to enhance its taste. This meat is special because it’s been dry-aged. It has more flavor and is tender. To enjoy it fully, learn how to cook it right and match it with the right flavors.
Flavor Pairings
Dry-aged beef tastes amazing because of its complex flavors. You can make these flavors even better with certain seasonings and sides. Try adding truffle oil, mushrooms, or a red wine reduction to it. Or, keep it simple with flaky sea salt and black pepper to let the beef’s taste stand out.
Recommended Recipes to Try
For the best taste of dry-aged beef, use it in dishes that highlight its unique flavor. A dry-aged steak au poivre is a great choice, as the peppercrust adds to the beef’s taste. Or, try a grilled dry-aged ribeye with roasted vegetables for a tasty meal. For something fancier, make a dry-aged beef Wellington by wrapping the beef in puff pastry and baking it.
When cooking dry-aged beef, remember it has less moisture. Use high-heat searing to get a crispy outside and a soft inside. Also, it cooks faster than regular beef, so watch the time closely.
Storing Dry Aged Beef Correctly
After dry aging your beef, it’s key to store it right. This keeps its special flavor and texture. The right storage methods ensure your dry aged beef stays top-notch, whether you’re eating it soon or saving it for later.
Refrigeration Techniques
For keeping it fresh for a bit, the fridge is best. Wrap the beef well to stop it from drying out or getting contaminated. Use tight wrapping or vacuum-sealing to keep it fresh. The fridge should be just above freezing, around 39°F (4°C), to slow down bacteria.
Freezing vs. Fresh Storage
Choosing between freezing and fridge storage depends on how soon you’ll eat it. For quick use, the fridge is fine. But if it’s going to be a while, freezing is better. Freezing keeps it fresh longer, but might change its texture a bit.
To freeze, wrap it tightly in plastic or foil, then in a freezer-safe bag to avoid freezer burn. Thaw it slowly in the fridge when you’re ready to eat it. This keeps its texture and taste just right.
Understanding the Costs of Dry Aging Beef
For those wanting to dry age beef at home, knowing the costs is key. It helps manage expectations and achieve success. Dry aging beef has several expenses, from equipment to the beef itself and aging time.
Budgeting for Equipment
First, you need the right equipment. This can range from a basic fridge to complex setups for temperature and humidity control. Equipment costs vary, from a few hundred to several thousand dollars.
When planning your budget, consider a few things:
- The size of the aging fridge or cabinet
- The level of temperature and humidity control
- Additional features like UV lighting or advanced airflow systems
Cost Analysis of Cuts and Time
The cost of dry aging beef goes beyond equipment. It also includes the meat and aging time. Different cuts have different aging potentials and costs. For instance, a prime ribeye might be pricier but offers better flavor and tenderness after aging.
To truly understand the cost, consider several factors. These include the meat’s initial cost, weight loss during aging, and yield after trimming. Here’s a way to calculate the cost per pound:
| Cut of Beef | Initial Cost | Weight Loss | Final Yield | Cost per Pound |
|---|---|---|---|---|
| Ribeye | $15/lb | 30% | 70% | $21.43/lb |
| Strip Loin | $18/lb | 25% | 75% | $24/lb |
| Filet Mignon | $25/lb | 20% | 80% | $31.25/lb |

Understanding these costs helps you make better choices. You can decide which cuts to age and for how long. This ensures your dry aging efforts are both successful and cost-effective.
Dry Aging at Home vs. Commercial Options
Exploring dry aged beef, you face a choice: age it yourself or let experts do it. Each path has its benefits, depending on your taste, goals, and budget.
Advantages of Home Dry Aging
Dry aging beef at home lets you control the aging process. You can adjust flavor and texture to your taste. It’s also cost-effective, as you can age multiple cuts without the commercial markup.
To age beef at home, you need a dry aging fridge or similar setup. It must keep the beef at the right temperature and humidity. With the right tools and patience, you can make top-quality dry aged beef at home.
Pros and Cons of Buying Aged Beef
Buying aged beef from a butcher or restaurant saves you from needing special equipment. It’s aged under perfect conditions, ensuring quality. But, it’s pricier than unaged beef.
When buying aged beef, look for at least 14 days of aging for a strong flavor. Avoid overly aged beef, as it can be dry and tough. Always buy from a trusted source for quality and safety.
| Aspect | Home Dry Aging | Commercial Dry Aging |
|---|---|---|
| Control Over Aging | High | Low |
| Initial Investment | Moderate to High | None (if buying) |
| Cost-Effectiveness | High (long-term) | Low |
| Risk | Moderate (contamination risk) | Low |
| Customization | High | Low |
Whether you age beef at home or buy it, knowing the pros and cons helps. It ensures you choose what fits your cooking needs and tastes.
Using Dry Aged Beef in Your Culinary Creations
Dry-aged beef is a versatile ingredient that can elevate a wide range of dishes. It adds rich flavor and tender texture to any meal. It’s perfect for both simple meals and gourmet creations.
Signature Dishes Featuring Aged Beef
For special occasions or dinner parties, dry-aged beef is a great choice. Try making Beef Wellington with dry-aged beef, mushrooms, and herbs wrapped in puff pastry. Or, serve a classic dry-aged ribeye with a cabernet reduction.
“A good beef dish is not just about the beef; it’s about the harmony of flavors and textures on the plate.”
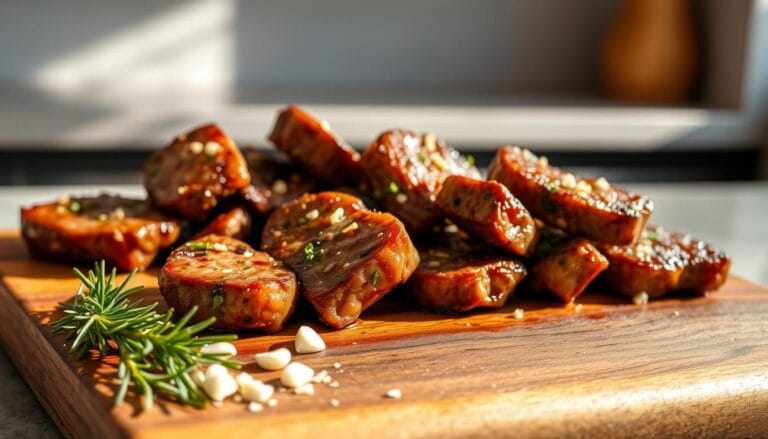
For a modern twist, use dry-aged beef in dishes like beef tataki. It’s seared and served with soy-ginger sauce. Or, make a dry-aged beef pho for a flavorful and comforting meal.
| Dish | Key Ingredients | Cooking Method |
|---|---|---|
| Beef Wellington | Dry-aged beef, puff pastry, mushrooms, herbs | Baked |
| Dry-Aged Ribeye | Dry-aged ribeye, cabernet reduction | Grilled |
| Beef Tataki | Dry-aged beef, soy-ginger sauce | Seared |
Elevating Everyday Meals
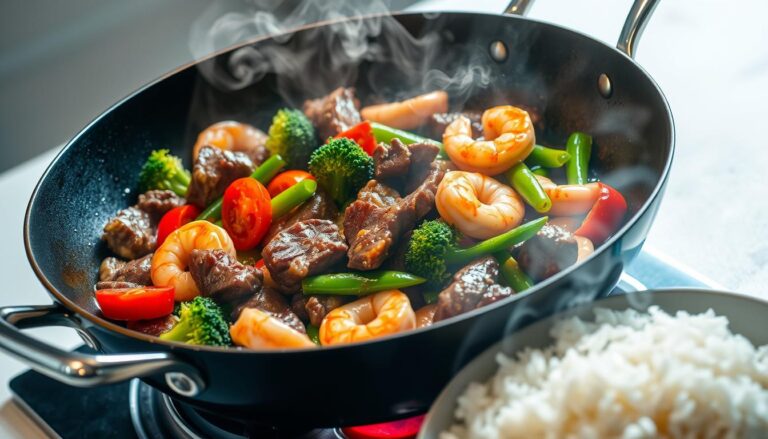
Dry-aged beef isn’t just for special occasions. It can also make your everyday meals better. Use smaller portions or less prime cuts in dishes like beef and broccoli stir-fry or dry-aged beef tacos.
You can also add dry-aged beef to compound butters or sauces. For example, make a dry-aged beef butter for steamed vegetables. Or, use dry-aged beef broth as a base for soups and stews.
- Use dry-aged beef in salads for a protein-packed meal.
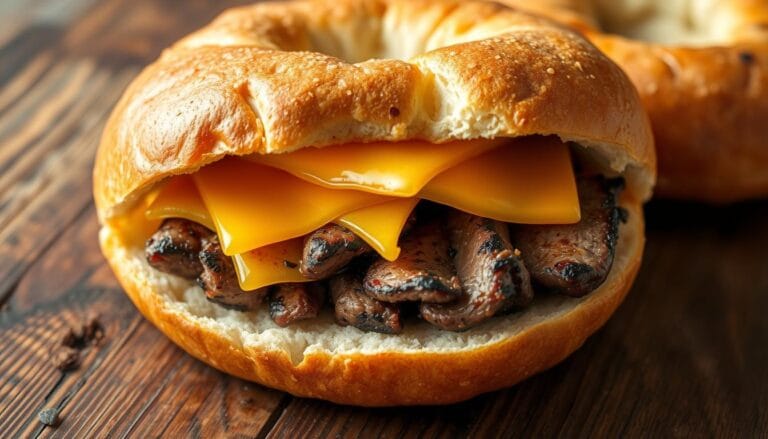
- Add slices of dry-aged beef to sandwiches for a gourmet touch.
- Incorporate dry-aged beef into pasta dishes for added richness.
By using dry-aged beef in your cooking, you’ll make your meals better. You’ll also appreciate its versatility and value.
Final Thoughts on Dry Aging Beef
Mastering dry aging beef is rewarding. It takes patience, but the flavors and textures are worth it.
Embracing dry aging as a culinary adventure lets you try different cuts and aging times. This way, you can make your dishes unique. When you know how to age meat perfectly, your cooking will impress everyone.
Learning to dry age beef at home connects you to a long tradition. As you keep trying new things, you’ll discover new flavors. Every meal will show off your skill and creativity.
FAQ
What is dry aging, and how does it work?
How do you dry age beef at home?
What cuts of beef are best for dry aging?
How long should you dry age beef?
How do you know if dry-aged beef has gone bad?
Can you dry age beef in a regular refrigerator?
What’s the difference between dry aging and wet aging?
Is dry-aged beef worth the cost?
How do you store dry-aged beef after aging?
Can you freeze dry-aged beef?
How do you cook dry-aged beef?
What are the benefits of dry aging beef at home?
For more cooking tips, stay connected with us. We also recommend the cookbook Skinnytaste Simple: Easy, Healthy Recipes with 7 Ingredients or Fewer
For more Recipes about Beef?
Did You try our recipe ?
There are no reviews yet. Be the first one to write one.