How to Cook New York Strip Steak Like a Pro
Table of Contents
How to Cook New York Strip Steak Like a Pro
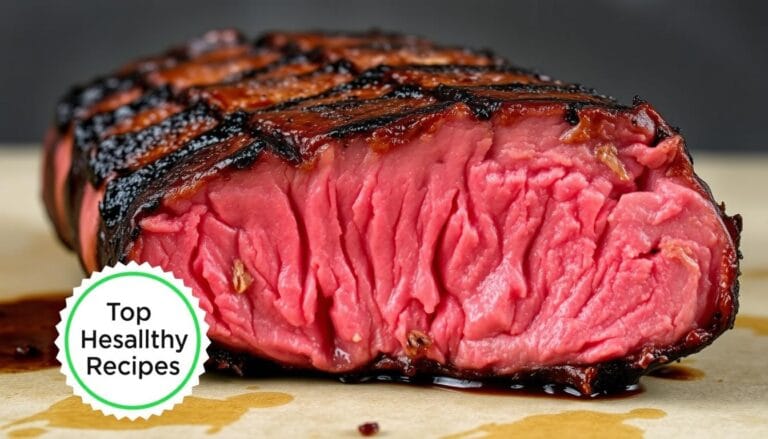
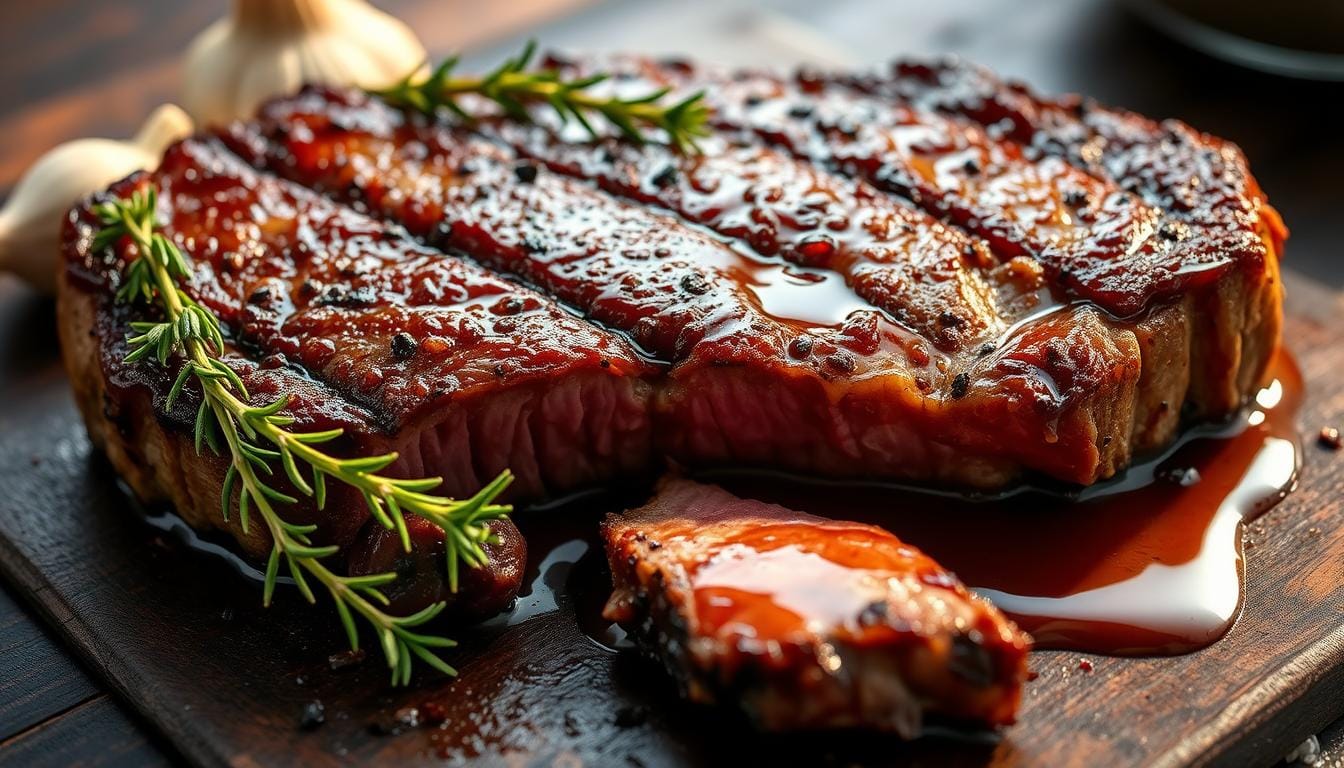
There’s something magical about slicing into a perfectly cooked steak. The crisp crust gives way to tender, pink-centered bliss. I’ll never forget the first time I nailed that restaurant-quality sear at home.
The sizzle of butter hitting the pan, the aroma of garlic and rosemary filling the kitchen… and the pride of serving a meal that made my family’s eyes light up. That’s the moment I realized: anyone can master this cut with the right techniques.
Whether you’re firing up the grill for summer gatherings or craving a cozy indoor dinner, this guide unlocks three fail-proof methods. You’ll discover why temperature control matters more than fancy tools. How to build layers of flavor with simple seasonings and the secret to avoiding chewy disappointment.
Let’s turn your kitchen into a steakhouse—no prior culinary degree required.
Key Takeaways
- Three expert-approved cooking methods: grilling, pan-searing, and oven finishing
- Essential seasoning strategies for maximum flavor depth
- Tool recommendations (hint: a cast-iron skillet is your best friend)
- The science behind resting meat for juicier results
- Time and temperature charts for perfect doneness
- Pro tips for achieving caramelized crusts without overcooking
Understanding New York Strip Steak
Before you start cooking, it’s important to know your meat. The New York strip steak is known for its bold taste and firm texture. It’s a top choice for steak lovers. Let’s explore what makes this cut special and how to pick the best for your new york strip steak recipe.
What Is New York Strip Steak?
This steak comes from the short loin, between the rib and sirloin. It’s leaner than ribeye but has a richer flavor than filet mignon. The steak has a fat cap that makes it juicy when cooked.
Here’s how it compares to similar cuts:
| Cut | Texture | Flavor | Fat Content |
|---|---|---|---|
| New York Strip | Firm | Beefy, robust | Moderate marbling |
| Ribeye | Buttery | Rich, buttery | Heavy marbling |
| Filet Mignon | Ultra-tender | Mild, delicate | Low marbling |
Cut Characteristics and Flavor Profile
The New York strip is versatile. It’s juicy but not too greasy. Choose USDA Prime or Choice grades for the best taste. Grass-fed steaks have an earthy taste, while grain-fed ones are sweeter.
Key traits to recognize:
- Thick, rectangular shape with a visible fat cap
- Moderate marbling (white flecks within the meat)
- Deep red color indicating freshness
When planning your new york strip steak recipe, remember it cooks faster. Its bold flavor goes well with simple seasonings like salt, pepper, or a garlic-herb rub.
Choosing the Right Steak
Your New York strip steak’s flavor begins long before it’s cooked. Whether you’re cooking strip steak on the stove or grilling it, choosing high-quality meat is key. This ensures your steak stays juicy. Let’s explore what to look for when shopping and how animal care affects your meal.
Selecting Quality Meat at the Grocery Store
First, check the steak’s marbling – the thin white streaks of fat. More marbling means better flavor and tenderness. Look for bright red flesh with creamy-white fat, avoiding grayish tones or dried edges.
When at the butcher, ask these questions:
- “What’s the USDA grade of this steak?” (Prime has the most marbling)
- “When was this cut packaged?”
- “Do you have thicker cuts for pan-searing?”
Considering Grass-Fed vs. Grain-Fed Options
Grass-fed beef is leaner and has earthier flavors. Grain-fed cuts are richer in marbling. Here’s a quick comparison:
| Feature | Grass-Fed | Grain-Fed |
|---|---|---|
| Fat Content | Lower | Higher |
| Cooking Style | Better for quick searing | Ideal for slow renders |
| Price Point | 20-30% higher | More budget-friendly |
If you’re cooking strip steak on the stove, grain-fed works well with high heat. Grass-fed is great for leaner meat, but watch cooking times closely.
Preparing the Steak for Cooking
Getting your New York Strip ready right can make all the difference. Whether it’s fresh or frozen, follow these steps for the best flavor and tenderness. Here’s how to thaw and season your steak like a pro.
Thawing Frozen Steak Safely
Thawing should never be rushed. Wrong methods can mess up the texture and safety. Here’s how to thaw your steak safely:
| Method | Time Required | Best For |
|---|---|---|
| Refrigerator | 12-24 hours | Planning ahead |
| Cold Water Bath | 1-2 hours | Last-minute cooking |
Refrigerator method: Put the frozen steak on a plate in the fridge. This slow thaw keeps juices in and prevents bacteria. It’s great for oven cooking later.
Cold water method: Put the steak in a waterproof bag. Soak it in ice water, changing it every 30 minutes. It’s perfect for when you need it fast for grilling or pan-searing.
The Importance of Dry Brining
Salt does more than add flavor—it changes the steak’s structure. Dry brining pulls moisture to the surface, then draws it back in with dissolved salt crystals. This process:
- Breaks down tough muscle fibers
- Creates a flavorful crust during cooking
- Helps retain juices when using high heat methods like oven roasting
For the best results with your new york strip in oven:
- Pat steak dry with paper towels
- Apply ¾ tsp kosher salt per pound
- Refrigerate uncovered 12-24 hours
Essential Equipment for Cooking Steak
The right tools make good steaks great. Whether you’re cooking indoors or outdoors, the right gear is key. It helps you control the steak’s texture and flavor. Here’s what you need to cook a juicy New York strip steak perfectly every time.
Recommended Cookware and Utensils
Your pan choice affects the steak’s crust and heat. Cast iron and stainless steel are best for cooking steak in a pan:
| Feature | Cast Iron | Stainless Steel |
|---|---|---|
| Heat Retention | Excellent (ideal for searing) | Good (requires preheating) |
| Maintenance | Needs seasoning | Dishwasher-safe |
| Best For | Even browning | Quick temperature adjustments |
Use silicone-tipped tongs to flip steak without piercing it. Metal utensils can tear the meat, losing juices. A sturdy spatula is also useful for moving steak to a cutting board.
Using a Meat Thermometer
Don’t guess the steak’s doneness. The ThermoPro TP-19H thermometer is great for its fast read time and accuracy. Insert the probe sideways into the steak’s thickest part for accurate results:
- Rare: 120–125°F
- Medium-rare: 130–135°F
- Medium: 140–145°F
Clean the thermometer right after use to avoid residue. This tool is very helpful when learning to cook a NY steak in a pan. Heat levels can change quickly.
Cooking Methods for New York Strip Steak
Learning to cook a New York strip steak is all about picking the right method. You can grill, skillet-fry, or broil it. Each way gives you different textures and tastes. Here are three ways to get a juicy steak every time.
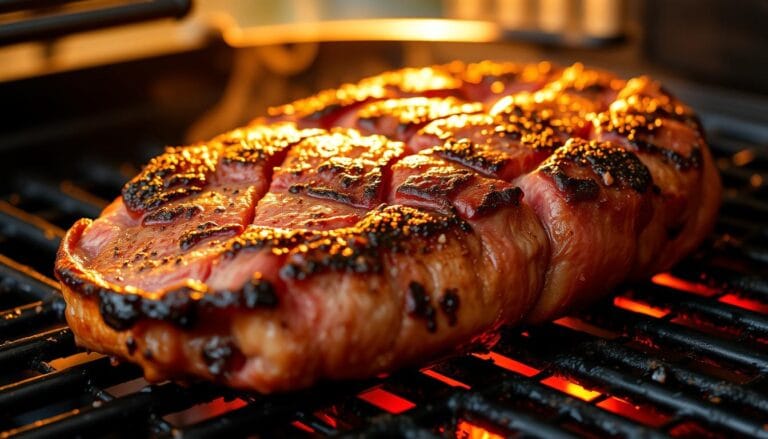
Grilling: Achieving Perfect Char
Fire management is key for great grilling. For charcoal grills, set up a two-zone area. One for high heat to sear, and another for finishing at lower heat. Gas grills should be preheated to 450-500°F. Always dry the steak to help it get a good crust.
Here’s how to grill like a pro:
- Sear steak 2-3 minutes per side over flames
- Move to indirect heat to finish cooking
- Flip only once to keep juices in
Pan-Searing: A Quick and Flavorful Technique
Avocado oil is great for searing because it has a high smoke point (520°F). It helps create a tasty crust without burning. Heat a heavy skillet until it’s almost smoking. Then, add butter, garlic, and rosemary for extra flavor.
Here are some pan-searing tips:
- Preheat the pan for 5 minutes on medium-high
- Blot the steak dry to remove excess moisture
- Cook undisturbed for 3-4 minutes on each side
Broiling: An Easy Alternative
For broiling, place your oven rack 3-4 inches below the broiler. Preheat for 10 minutes. Use a pan safe for broiling. This method is best for 1-1.5″ thick steaks. It gives a nice caramelized outside and a tender inside.
Broiling tips:
- Use a wire rack to elevate the steak in the pan
- Check every 2 minutes to avoid burning
- Let the steak rest for 8 minutes before slicing
Seasoning Your Steak
Great seasoning can turn your New York strip steak into something amazing. Salt is key, but how and what you add to it matters a lot. Let’s explore the best ways to add flavor to your new york strip steak recipe.
Basic Seasoning Techniques
The size of salt crystals affects how meat absorbs flavor. Larger grains, like kosher salt, season slowly and evenly. Smaller salts stick to the surface but can be too much if used too much. For the best taste:
- Pat steaks dry before seasoning
- Apply salt 40 minutes before cooking
- Use ¾ teaspoon kosher salt per 8 oz steak
Adding salt with cracked black pepper gives a classic taste. If using table salt, use half as much to avoid too much salt.
Experimenting with Marinades and Rubs
Try bold rubs or marinades to make your new york strip steak recipe even better. Here are three great options:
| Rub Type | Ingredients | Best Pairing |
|---|---|---|
| Coffee-Chili | Ground coffee, ancho chili, brown sugar | Smoky side dishes |
| Herbes de Provence | Lavender, thyme, rosemary, garlic | Red wine sauces |
| Smoked Paprika | Paprika, cumin, coriander, orange zest | Citrus-based salads |
Marinating times depend on the steak’s thickness:
| Steak Thickness | Minimum Time | Maximum Time |
|---|---|---|
| 1 inch | 30 minutes | 2 hours |
| 1.5 inches | 1 hour | 4 hours |
| 2 inches | 2 hours | 6 hours |
“Always pat off excess marinade before cooking to avoid burning. The goal is to add flavor, not a burnt crust.”
Cooking Times and Temperatures
To get your New York strip steak perfectly cooked, you need to focus on two things: the right temperatures and the timing. Whether you’re cooking on a stovetop, grill, or broiler, these factors are key. They decide if your steak is tender and juicy or dry and overcooked.
Understanding Doneness Levels
Steak doneness is more than just a matter of taste—it’s a science. The internal temperature of your meat greatly affects its texture and taste. Here’s a guide to help you:
| Doneness | Temperature (°F) | Texture |
|---|---|---|
| Rare | 125-130 | Cool red center |
| Medium Rare | 130-135 | Warm red center |
| Medium | 135-145 | Pink throughout |
| Medium Well | 145-155 | Slightly pink center |
| Well Done | 155-160 | Little to no pink |
Pro tip: Always take your steak off the heat 5-10°F before your target temperature. This is because the meat will continue cooking (called carryover cooking) for 5-10 minutes while it rests.
Timing Your Steak Right
For stovetop cooking, the timing depends on the steak’s thickness and how you like it cooked:
- 1-inch steak: 4-5 minutes per side for medium rare
- 1.5-inch steak: 6-7 minutes per side for medium
Grill and broiler times are a bit different:
- Grill: Cook 1 minute less per side than on the stovetop
- Broiler: Cook 1 minute less than on the stovetop
Get a digital meat thermometer—it’s the best way to check if your steak is done. Stick it into the thickest part of the steak for accurate readings.
Resting Your Steak
You’ve cooked your New York strip to perfection – now comes the step many home chefs rush through. Resting your steak isn’t just a suggestion; it’s the final act that transforms good meat into a juicy masterpiece. Let’s break down why this pause matters and how to execute it flawlessly.

Why Resting is Crucial
When heat hits steak, muscle fibers tighten and push juices toward the center. Resting gives those fibers time to relax and reabsorb moisture. Skip this step, and your first cut will send those precious juices straight onto the plate instead of staying in the meat.
For New York strip cooked in the oven, resting also lets residual heat finish the cooking process gently. This means your medium-rare steak won’t accidentally become medium while sitting on the counter.
How to Properly Rest Your Steak
Follow these steps for optimal results:
- Transfer the steak to a warm plate – cold surfaces shock the meat
- Choose your covering method:
- Tented foil: Keeps heat in better, ideal for thicker cuts
- Uncovered: Preserves crispy crust from oven roasting
- Use the weight-based formula: Rest 1 minute per ounce (12 minutes for a 12oz steak)
Need to keep sides warm? Place the resting plate on a stovetop burner you used earlier – residual heat will maintain temperature without overcooking.
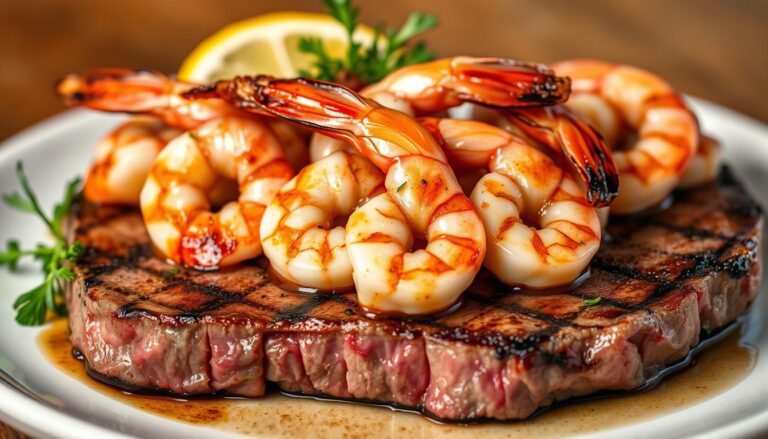
Serving Suggestions
Your perfectly cooked New York strip steak deserves great sides and drinks. Whether you want a classic steakhouse feel or something modern, the right choices make your meal complete.
Pairing with Side Dishes
Classic steakhouse sides add timeless charm to your meal. Creamed spinach pairs well with the steak’s char, while duchess potatoes bring a buttery, crispy touch. For a lighter choice, try garlic-roasted asparagus with lemon zest.
For fresh flavors, consider these modern sides:
| Side Dish | Flavor Profile | Prep Time |
|---|---|---|
| Quinoa & Kale Salad | Nutty, tangy | 20 minutes |
| Miso-Glazed Carrots | Sweet, umami | 25 minutes |
| Truffle Parmesan Fries | Savory, aromatic | 30 minutes |
Choosing the Right Wine
A bold red wine is perfect with a steak. Cabernet Sauvignon is great for fatty cuts, balancing the flavors. Argentine Malbec pairs well with the steak’s smoky taste, thanks to its dark fruit notes and smooth finish.
Other wine options include:
- Zinfandel for spicy rubs
- Syrah for herb-crusted steaks
- Dry rosé for summer meals
Common Mistakes to Avoid
Even the most experienced home cooks can make mistakes when cooking New York Strip Steak. Here are five common errors to avoid to keep your steak juicy and full of flavor:
- Cold pan starts: A lukewarm skillet won’t create the crust you crave. Always preheat your pan or grill.
- Over-flipping: Constant turning prevents proper browning. Limit flips to 2-3 times maximum.
- Ignoring internal temperature: Guessing doneness leads to disappointment. Use a meat thermometer.
Overcooking the Steak
The difference between medium-rare and overcooked steak is small. Remove steak from heat 5°F below your target temperature. The steak will finish cooking with the residual heat. If it’s too dry, try this rescue method:
- Slice steak against the grain
- Melt 2 tbsp butter in a pan
- Toss slices in butter for 30 seconds
Skipping the Resting Period
Cutting into steak right away lets juices spill out. Let it rest at least 5 minutes under loose foil. This waiting time helps:
- Muscle fibers to relax
- Internal temperature to equalize
- Juices to redistribute evenly
Being patient pays off. Your steak will stay moist, even if you prefer it well-done.
Enhancing Flavor After Cooking
Your perfectly cooked New York strip steak needs a final flavor boost. These finishing touches turn good steaks into restaurant-quality masterpieces without extra cooking time. Compound butters, specialty salts, and fresh herbs make every bite special.
Compound Butters and Finishing Salts
Slather these easy-to-make flavored butters on your steak while it rests. The residual heat melts them into a velvety sauce:
- Garlic-Herb Butter: Mix softened butter with minced garlic, parsley, and a pinch of black pepper
- Blue Cheese-Walnut Butter: Blend crumbled blue cheese, toasted walnuts, and chives into unsalted butter
- Chili-Lime Butter: Combine butter with lime zest, smoked paprika, and a dash of cayenne pepper
Finishing salts add both texture and nuanced flavor. Compare two popular options:
| Salt Type | Texture | Best Use |
|---|---|---|
| Himalayan Pink | Crunchy crystals | Balancing rich meat flavors |
| Fleur de Sel | Delicate flakes | Highlighting natural beef taste |
Adding Fresh Herbs for Presentation
Turn your steak into a visual showstopper with herb garnishes. Rosemary sprigs add earthy aroma when placed beside the meat, while chopped chives create vibrant color contrast. For citrus-infused butter varieties, try pairing with thyme leaves or micro cilantro.
Always add herbs just before serving to maintain their texture. Press whole leaves gently onto compound butter toppings for a professional plating look that says “chef-crafted” without the fuss.
Storing Leftovers
Your steak’s journey doesn’t end after cooking. Proper storage keeps every bite safe and flavorful. Whether you cooked it on the stove or grilled it, these tips help maintain quality and prevent illness.

Proper Cooling Techniques
Cool cooked steak within 2 hours of serving, as the FDA recommends. For faster cooling:
- Slice meat into thinner portions to speed up heat release
- Place steak in shallow containers (no deeper than 2 inches)
- Use an ice bath for rapid cooling if storing large quantities
Avoid wrapping hot steak in foil. Trapped steam can lead to bacteria growth. Pat dry with paper towels before refrigerating to remove excess juices.
Reheating Methods for Best Results
Revive leftovers without losing tenderness with these methods:
| Method | Time | Texture | Best For |
|---|---|---|---|
| Sous Vide | 45-60 min | Juicy, even heat | Thick cuts |
| Skillet | 3-5 min/side | Crispy crust | Quick meals |
| Oven | 10-15 min | Gentle warmth | Multiple servings |
For skillet reheating, use medium heat and a teaspoon of oil. Add a pat of butter during the last minute for extra richness.
Storage Duration Guidelines
- Refrigerated: 3-4 days in airtight containers
- Frozen: 2-3 months vacuum-sealed
Label packages with dates to track freshness. Thaw frozen steak overnight in the fridge before reheating.
Tips for a Restaurant-Style Experience
Turn your homemade New York strip steak into a gourmet dish with a few presentation tricks. Whether you cooked it in the oven or on the grill, these tips will make your meal look and taste like it came from a chef’s kitchen.
Plating and Presentation Tips
Begin with a clean, white plate to highlight the steak’s sear and juices. Place your oven-roasted New York strip on top of mashed potatoes or roasted veggies. Here’s how to make your dish visually appealing:
- Drizzle sauce in artistic swirls around the plate edge
- Garnish with microgreens or edible flowers
- Wipe plate edges with a clean towel before serving
How to Serve Like a Professional
Pair your steak with these key serving items:
| Item | Purpose | Pro Recommendation |
|---|---|---|
| Steak Knives | Serrated edge for easy cutting | Wüsthof Classic 4.5″ |
| Linen Napkins | Elevated texture | Tri-fold with restaurant crease |
| Serving Platter | Heat retention | Warmed cast iron |
Let the steak rest for 5 minutes after taking it out of the oven. This keeps the juices inside for that perfect restaurant-quality bite. Serve cutting boards at the table for a dramatic slicing experience. Always serve sauce in a small ramekin to keep it crispy.
Cooking Steak Indoors vs. Outdoors
Your cooking environment greatly affects the taste and texture of New York strip steak. Outdoor grilling gives a smoky char, while indoor pan-searing offers precise control for any time of year. Let’s explore the benefits, techniques, and tools for both methods.
Indoor Cooking Tips for Year-Round Enjoyment
Use a heavy-bottomed skillet like cast iron to mimic grill-like heat retention. Preheat your pan until it’s smoking hot for a perfect crust. Here’s how to maximize flavor indoors:
- Open windows or use an exhaust fan to manage smoke during high-heat searing
- Pat steaks dry before cooking to prevent steam and splatter
- Finish with butter basting using fresh thyme or rosemary
Indoor methods are great for how to cook a NY steak in a pan when you can’t grill. You can get caramelization that’s just as good as outdoor grilling with the right technique.
Outdoor Grilling Tips for BBQ Season
Charcoal or gas grills add unique smoky flavors that enhance New York strip. Here’s a pre-grill checklist:
- Clean grates thoroughly with a wire brush
- Oil grates lightly to prevent sticking
- Create two heat zones (direct and indirect)
For the best grill marks, place steak diagonally across grates and rotate 45° after 2 minutes. Keep temperatures between 450-500°F using these methods:
| Heat Source | Flavor Impact | Temperature Control |
|---|---|---|
| Charcoal | Bold smokiness | Adjust vent positions |
| Gas | Clean, even heat | Use burner knobs |
“The sizzle of steak hitting a hot grill is summer’s anthem – but mastering indoor searing means great flavor any day of the year.”
Frequently Asked Questions About Steak
Whether you’re new to cooking or have been doing it for years, you might have questions about New York strip steak. We’ll cover common topics like doneness, cooking from frozen, and myths that could impact your results.
How to Choose the Right Doneness?
Use a meat thermometer for accurate results. The USDA says to cook steak to at least 145°F (medium) for safety. But, people have different preferences:
- Rare (125°F): Bright red center, very juicy
- Medium (135–145°F): Pink center with firmer texture
- Well-Done (160°F+): Fully browned, minimal moisture
Many think marbling affects doneness, but it actually improves flavor. For better results, try the reverse sear method. Cook the steak slowly first, then sear it quickly at high heat.
Can You Cook Steak from Frozen?
Yes, you can cook steak from frozen safely. Here’s how:
- Pat the steak dry to improve searing
- Cook on low heat until thawed internally
- Sear at high heat for a crispy crust
This method is great for hibachi steak preparation, which uses intense heat. Always check the steak’s doneness with a thermometer.
Debunking Common Myths
Myth: “Salting steak dries it out.” Truth: Dry brining (salting 1–2 hours before cooking) actually makes the steak juicier. For more tips, check out our Seasoning Your Steak section.
Conclusion: Mastering Your New York Strip Steak
Mastering a new york strip steak recipe is about technique and creativity. It’s important to manage heat, rest the steak, and season it well. These steps help you get a juicy steak, whether you grill outside or use a skillet indoors.
Key Takeaways for Consistent Success
Use a meat thermometer to control cooking temperatures. This ensures your steak is cooked just right. Let the steak rest for 5-7 minutes to keep it juicy.
Try unique seasonings like kosher salt crusts or coffee rubs. These add depth to the steak’s flavor. These tips work for all cooking methods mentioned earlier.
Expand Your Flavor Horizons
For a smoky flavor, use hickory wood chips. Cherry wood adds a sweet touch. Explore flavors from around the world, like Argentine chimichurri or Japanese tare sauce.
Pro Tip: Trust your instincts after mastering the basics. High heat makes better crusts, and don’t press the steak too much. Share your steak creations on social media with #SteakMastery.
Every steak you cook makes you more confident. Keep track of your favorite cooking methods and flavors. This way, you’ll make every dinner special and impress your guests at barbecues.
FAQ
What’s the difference between New York Strip and ribeye steaks?
Can I cook New York Strip steak directly from frozen?
How do I choose the right doneness level for my steak?
Is dry brining essential for cooking New York Strip steak?
What’s the best pan for pan-searing a New York Strip?
How long should I let my steak rest after cooking?
Can I salvage an overcooked New York Strip steak?
What’s the safe internal temperature for New York Strip steak?
Does grass-fed beef cook differently than grain-fed New York Strip?
What wine pairs best with New York Strip steak?
For more cooking tips, stay connected with us. We also recommend the cookbook Skinnytaste Simple: Easy, Healthy Recipes with 7 Ingredients or Fewer
For more Recipes about Steak ?
Did You try our recipe ?
There are no reviews yet. Be the first one to write one.