How to Cook Dry Aged Steak for Ultimate Restaurant-Style
Table of Contents
How to Cook Dry Aged Steak for the Ultimate Restaurant-Style
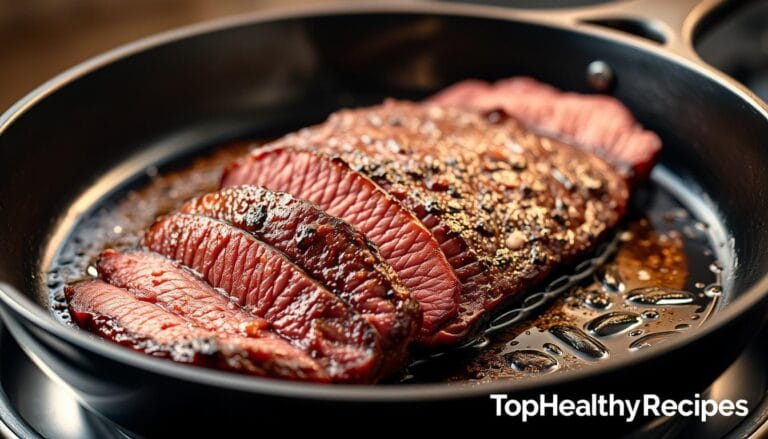
Cooking dry aged steak is an art that needs precision, patience, and a deep understanding. When you buy dry aged steak, you’re getting a culinary experience. The rich flavor and tender texture come from a careful aging process.
To get the best out of dry aged steak, knowing the best cooking techniques is key. Whether you’re a seasoned chef or a home cook, learning to cook dry aged steak can improve your skills. This guide will show you how to cook a perfectly dry aged steak. You’ll enjoy its full flavor and tenderness.
Key Takeaways
- Understanding the unique qualities of dry aged beef
- Selecting the right cut for optimal flavor and tenderness
- Preparation techniques to enhance the natural flavors
- Mastering various cooking methods for dry aged steak
- Tips for serving and pairing dry aged steak
Understanding Dry Aged Steak
To truly appreciate dry aged steak, you need to know how it’s made. Dry aging is a process that lets the steak sit in a special environment. This environment helps the steak’s flavor and tenderness grow. It’s a mix of art and science, needing careful control over temperature, humidity, and time.
What is Dry Aging?
Dry aging makes the steak’s surface dry and breaks down its proteins and fats. This process makes the steak’s flavors stronger and tenderer. The steak becomes more flavorful and tender than before.
Dry aging is different from wet aging, where the steak is aged in sealed bags. The dry air creates a flavorful crust on the steak, called the “pellicle.”
Benefits of Dry Aged Steak
Dry aged steak has many advantages over wet-aged or fresh steak. The aging process makes the steak’s flavors more complex and intense. It also makes the steak tenderer.
- Enhanced Flavor: The aging process concentrates the steak’s flavors.
- Increased Tenderness: The breakdown of proteins and fats makes the steak tenderer.
- Unique Texture: The steak develops a flavorful crust.
Flavor Profile Comparison
Dry aged steak has a unique flavor compared to wet-aged or fresh steak. It has nutty, earthy, and funky notes, developed during aging.
| Steak Type | Flavor Profile | Texture |
|---|---|---|
| Dry Aged | Nutty, Earthy, Funky | Tender, Crusty |
| Wet Aged | Mild, Beefy | Tender, but less crusty |
| Fresh | Raw, Beefy | Variable |
Selecting the Right Cut of Steak
The art of cooking dry aged steak starts with picking the right meat. There are many cuts to choose from. Knowing what each cut offers can make your dry aging better.
Popular Cuts for Dry Aging
Some cuts are better for dry aging because of their fat and muscle. Ribeye, strip loin, and porterhouse are favorites. They’re fatty, making the meat tender and flavorful.
How to Choose Quality Meat
Choosing the right cut is key. Look for meat that’s a deep red and firm. Also, choose meat from farms or suppliers known for quality and care.
Importance of Marbling
Marbling, or the fat in the meat, makes it tender and tasty. More marbling means a juicier steak. It also adds flavor as the steak cooks.
| USDA Grade | Marbling Score | Description |
|---|---|---|
| Prime | Abundant | High marbling, tender, and flavorful |
| Choice | Moderate | Less marbling than Prime, but tender and tasty |
| Select | Small | Leaner, less tender than Prime or Choice |
Knowing about these factors helps when buying dry aged steaks. Focus on the cut’s quality and marbling for the best results.
Preparing Your Dry Aged Steak
To get the most out of your dry aged steak, you need to prepare it right. This means following a few important steps. These steps will make sure your steak is ready to cook and tastes amazing.
Thawing the Steak Properly
If your dry aged steak is frozen, thawing it correctly is key. The best way is to thaw it in the fridge slowly over hours or overnight. This keeps the steak’s quality and texture top-notch. Or, you can thaw it under cold running water, changing the water every 30 minutes to keep it safe.
Never thaw your steak at room temperature or in hot water. This can cause bacteria to grow and lower the steak’s quality.
Trimming Excess Fat
Dry aged steaks often have a dried crust and extra fat. Cutting off this fat can make the steak look and taste better. But, don’t remove too much fat. It’s good for the steak’s tenderness and flavor.
| Trimming Technique | Description | Benefit |
|---|---|---|
| Removing dried crust | Carefully cut away the dried exterior | Improves texture and appearance |
| Excess fat removal | Trim excess fat around the edges | Enhances flavor and presentation |
| Preserving marbling | Leave the intramuscular fat intact | Maintains tenderness and flavor |
Seasoning Techniques
Seasoning is a big part of preparing your dry aged steak. You can use simple salt and pepper to highlight the meat’s natural taste. Or, you can try more complex rubs and marinades to add to the steak’s unique flavor.
Timing is everything when seasoning. Seasoning too early can make the steak too salty. Seasoning too late might not let the flavors soak in well.
For a simple seasoning, sprinkle salt and pepper on both sides of the steak right before cooking. For more complex flavors, use a rub or marinade with garlic, thyme, or paprika.
Cooking Methods for Dry Aged Steak
Whether you’re a seasoned chef or just starting out, learning to cook dry aged steak is key. There are many ways to cook it, each giving a unique taste. The method you choose depends on your tools, skill level, and the steak cut.
Grilling Your Dry Aged Steak
Grilling is a favorite for adding smoky flavor and a nice char. To grill well, use both direct and indirect heat. This method helps sear the steak quickly and then cooks it evenly without flare-ups.
- Preheat your grill to high heat.
- Sear the steak for 2-3 minutes per side to achieve perfect grill marks.
- Move the steak to the indirect heat zone to finish cooking to your desired level of doneness.
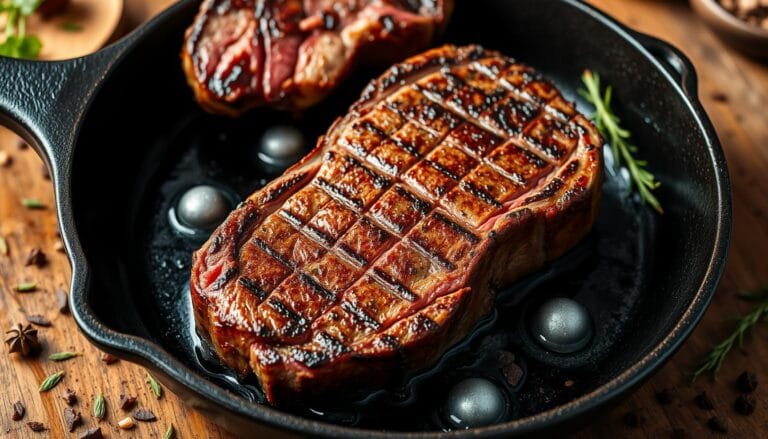
Pan-Seering Tips
Pan-searing is great for a restaurant-quality sear at home. Choose a skillet that can handle high heat, like cast iron or stainless steel.
Key steps for pan-searing include:
- Heating the pan until it’s almost smoking.
- Adding a small amount of oil to the pan.
- Searing the steak for 2-3 minutes per side.
- Finishing the steak in the oven if necessary.
Oven Roasting Techniques
Oven roasting is perfect for bigger cuts of dry aged steak. It cooks evenly, making the steak tender and juicy. Preheat your oven to about 200°F and roast until it’s just right.
Using a meat thermometer is key to get the steak cooked to the right temperature.
Sous Vide for Perfect Results
Sous vide cooking is precise for perfect doneness. Seal the steak in a bag and cook it in a water bath at a set temperature. This method ensures consistent results.
- Season the steak before sealing it in a sous vide bag.
- Cook the steak in a preheated water bath to your desired temperature.
- Sear the steak in a hot pan after sous vide cooking for a flavorful crust.
Each cooking method has its own benefits. The best one for you depends on your situation and taste. Try different methods to find your favorite way to cook dry aged steak.
Cooking Temperatures Explained
When cooking dry aged steak, controlling temperature is key. It affects the steak’s texture and taste. Finding the perfect doneness is a fine balance. You need to know the different levels of doneness and their ideal temperatures.
Understanding Doneness Levels
Doneness levels go from rare to well-done, each with its own traits. These levels are usually rare, medium rare, medium, medium well, and well-done. You can tell these levels by looking and feeling the steak.
Ideal Temperatures for Dry Aged Steak
The perfect internal temperature for dry aged steak depends on the doneness you want. For example, medium-rare is usually around 130°F – 135°F (54°C – 57°C).
| Doneness Level | Internal Temperature (°F) | Internal Temperature (°C) |
|---|---|---|
| Rare | 120-125 | 49-52 |
| Medium Rare | 130-135 | 54-57 |
| Medium | 140-145 | 60-63 |
For more cooking tips, check out recipes like shrimp on steak.
Using a Meat Thermometer Effectively
A meat thermometer is essential for getting your steak to the right temperature. Instant-read thermometers give quick results, while leave-in probe thermometers monitor continuously. To use it right, put the probe in the steak’s thickest part, away from fat or bone.
Resting Your Steak
After cooking your dry aged steak, the real magic begins during the resting phase. Resting is a key step that many overlook. It lets the juices spread evenly, making the steak juicier and more flavorful.
Why Resting is Important
Cooking a steak causes the proteins to contract and juices to move to the surface. Cutting into it right away lets these juices spill out. But, letting it rest allows the proteins to relax and juices to spread, making each bite full of flavor.
Recommended Resting Times
The resting time for your steak depends on its thickness and cooking method. Generally, rest a steak for 5 to 10 minutes. Thicker steaks might need longer. Here’s a simple guide:
| Steak Thickness | Recommended Resting Time |
|---|---|
| 1-1.5 inches | 5 minutes |
| 1.5-2 inches | 7-8 minutes |
| Over 2 inches | 10 minutes or more |
How to Rest Your Steak Properly
To rest your steak right, place it on a wire rack over a baking sheet or plate. You can cover it with foil to keep it warm. Make sure it rests in a warm, draft-free spot. Avoid cold surfaces to prevent temperature drops.
By following these tips, your dry aged steak will stay juicy and flavorful. Remember, patience is key during the resting phase.
Serving Suggestions
Now that you’ve learned to cook dry aged steak, it’s time to enhance your meal. The right sides can turn a good steak into a memorable dish.
Best Side Dishes to Pair
Choosing the right sides is key to enjoying dry aged steak. Creamed spinach and potato preparations are classic picks. Creamed spinach’s creamy texture and slight bitterness contrast well with the steak’s savory flavors. Potatoes, whether roasted, mashed, or in gratin, complement the bold taste of dry aged beef.
For a lighter option, try roasted vegetables or a fresh green salad. Roasted veggies add crunch and flavor that balances the steak’s richness. A simple green salad with a light vinaigrette cleanses your palate between steak bites.
Wine Pairing for Dry Aged Steak
Wine pairing can elevate your meal. For dry aged steak, a full-bodied red wine is best. Cabernet Sauvignon, Syrah/Shiraz, and Malbec are top picks. Their bold flavors match the steak’s intense taste, creating a perfect balance.
If you like white wine, a rich Chardonnay works well, even with butter-based sauces. Its oakiness and acidity enhance the steak’s flavors without overpowering them.
Creating a Stunning Presentation
The way you present your steak matters a lot. Start by slicing the steak thinly against the grain. Place the slices on a warm plate to keep them at the right temperature. Add fresh herbs or flaky sea salt for a pop of color and flavor.
For a dramatic look, serve your steak on a wooden board or cast-iron skillet. These add a rustic touch and keep the steak warm. Drizzle any remaining sauce or juices over the steak just before serving to keep it moist.
Common Mistakes to Avoid
To enjoy dry aged steak, avoid mistakes that can ruin its taste. Cooking this premium meat needs careful attention and knowledge of common errors. These errors can make the steak less than perfect.
Overcooking: A Dry Aged Steak’s Worst Enemy
Overcooking is bad for dry aged beef because it has less moisture. This can make the meat tough and dry. To prevent this, use a meat thermometer to check the internal temperature without overcooking.
Warning Signs: If the steak gets too firm or the edges too dark, it’s overcooked. Recovery Techniques: If it’s overcooked, slicing it thinly against the grain can help.
The Importance of Bringing Steak to Room Temperature
Not letting the steak warm up before cooking can cause uneven cooking. This step ensures even cooking. Let the steak sit at room temperature for 30 minutes to 1 hour before cooking.
Don’t Skip the Resting Period
Skipping the resting period is a big mistake that wastes the quality of dry aged beef. Resting lets the juices spread, making the steak tender and flavorful. Rest for 5-10 minutes before slicing.

Other mistakes include seasoning too early, flipping too much, and using the wrong tools. Seasoning too soon can make it too salty. Using the wrong utensils can damage the steak.
By knowing and avoiding these mistakes, you’ll cook dry aged steaks better. This ensures a great dining experience.
Storing Leftover Dry Aged Steak
Dry aged steak is a premium product. It’s important to store and reheat leftovers right to keep its flavor and texture. You’ll want your leftover steak to taste as good as the first time you had it.
Proper storage is key to keeping your leftover steak fresh. You need to follow a few steps to avoid drying out or contamination.
Proper Refrigeration Techniques
Wrap your leftover steak tightly. Use plastic wrap or aluminum foil to keep air out. This helps prevent drying. For extra protection, put it in a sealed container or zip-top bag.
Keep the steak in the fridge at a temperature below 40°F (4°C). Store it in the coldest part of the fridge, like the bottom shelf.
Reheating Methods to Preserve Flavor
Choosing the right reheating method is important. Gentle oven warming or sous vide reheating are best. Oven reheating uses a low temperature oven (around 200°F or 90°C) until it’s warm. Sous vide reheating controls the temperature for even heating.
Don’t use the microwave to reheat dry aged steak. It can heat unevenly and change the texture. Instead, slice the steak thinly and use it in salads or sandwiches. This way, it can be gently warmed or served at room temperature.
By storing and reheating your dry aged steak correctly, you can enjoy it fully, even on later servings.
Final Tips for Success
Cooking dry aged steak to perfection requires knowing how to adjust cooking methods. This depends on the steak’s thickness and your cooking tools. Mastering these techniques can greatly improve your cooking skills.
Experimenting with Rubs and Marinades
Trying out different rubs and marinades can really boost the flavor of dry aged steak. A good rub can add a rich flavor that complements the steak’s natural taste. A mix of paprika, garlic powder, and thyme is a classic choice. For a bolder taste, a marinade with soy sauce, Worcestershire sauce, and olive oil works well.
- Apply rubs evenly across the steak, making sure to coat all surfaces.
- For marinades, ensure the steak is fully submerged and refrigerated for the recommended time.
- Always pat dry the steak before cooking to achieve a good sear.
Adjusting for Your Equipment
The equipment you use can greatly affect your dry aged steak. Whether you’re using a high-end grill, a basic stovetop, or an indoor cooking setup, knowing your equipment’s strengths and limitations is key. For example, a grill can give a nice char, while a stovetop offers precise temperature control.
Here are some tips for cooking with different equipment:
- Preheat your grill or pan to the right temperature before adding the steak.
- Use a thermometer to ensure your oven or grill is at the correct temperature.
- For indoor cooking, a cast-iron skillet can provide excellent heat retention and distribution.
Tailoring Cooking Times to Thickness
Cooking time depends on the steak’s thickness. Thicker steaks need longer cooking times, while thinner ones cook faster. A good rule of thumb is to cook steaks for 4-6 minutes per side for every inch of thickness. But, this can change based on the desired doneness and cooking method.
Here are some guidelines for cooking times:
| Steak Thickness | Cooking Time (Rare) | Cooking Time (Medium Rare) |
|---|---|---|
| 1 inch | 4-5 minutes per side | 5-6 minutes per side |
| 1.5 inches | 6-7 minutes per side | 7-8 minutes per side |
| 2 inches | 8-10 minutes per side | 10-12 minutes per side |
By understanding these factors and adjusting your cooking techniques, you can make a perfectly cooked dry aged steak that meets your taste preferences.
Enhancing Flavor with Searing
To get the most out of dry aged steak, learning to sear it is key. Searing not only makes the steak look great but also boosts its taste. It creates a crust on the steak’s surface through a chemical reaction called the Maillard reaction.
Reverse Searing Explained
Reverse searing means cooking the steak low and slow first, then searing it hot. This method works well for thick cuts, ensuring even cooking. Start by cooking your steak in a 200°F oven until it’s just right. Then, sear it hot in a skillet or on a grill.
For more tips on cooking and marinades for dry aged steak, check out the venison steak marinade. It can help you improve the flavor of different steaks.
Searing Techniques to Lock in Juices
The idea that searing “locks in juices” is a myth. Searing actually improves the steak’s taste and texture. To get a perfect sear, use a cast iron or carbon steel pan. You can also use a broiler or torch for a great crust.
Make sure the steak is dry before searing. Excess moisture can ruin the crust. Heat your pan until it’s almost smoking, then add oil and the steak. It should sizzle right away.
To avoid smoke and get a good sear, keep the steak away from flames if grilling. Also, make sure your kitchen is well-ventilated. With these searing tips, you can make your dry aged steak taste amazing.
Exploring Dry Aging at Home
You can dry age steak at home with the right tools and knowledge. This lets you control the aging process. You might get more personalized flavors this way.
The Essentials for Dry Aging
To begin, you need specific gear. A dedicated fridge is key for keeping the right temperature. You might also need tools for controlling humidity and air flow.
Key Equipment:
- A dedicated refrigerator or a dry aging fridge
- Humidity control systems
- Air circulation fans
- Dry aging bags or a simple refrigerator setup as alternatives

Duration and Conditions for Optimal Aging
The aging time affects the steak’s taste and tenderness. It can last from 14 to 45 days or more. It’s important to know what happens during this time.
At first, the meat loses a lot of moisture. This makes the flavors stronger. As time goes on, the meat gets even softer.
Aging Stages:
- 14-21 days: Initial moisture loss and flavor concentration.
- 21-28 days: Noticeable tenderization and development of complex flavors.
- 28-45+ days: Advanced aging with intense flavors and tender texture.
Safeguards to Consider
When dry aging at home, safety is a top priority. Keeping the temperature right is key to avoid bacteria. Always check the fridge’s temperature. Also, watch for mold and know how to handle it.
Safety Measures:
- Maintain a consistent refrigerator temperature below 39°F (4°C).
- Monitor for mold and know how to safely remove it.
- Ensure good air circulation to prevent moisture buildup.
With the right equipment, knowledge of aging time, and safety steps, you can dry age steak at home. This will make your cooking even better with perfectly aged meat.
Popular Dry Aging Brands
Finding the right dry aged beef requires knowing good suppliers. There are many brands out there. It’s important to understand what makes them different.
Notable Suppliers in the U.S.
In the U.S., some brands stand out for their dry aged beef. Creekstone Farms and Snake River Farms are known for their quality. They focus on quality and being open about how they age their beef.
Online, you can also find ButcherBox and Crowd Cow. They offer dry aged products from trusted farms.
What to Look for in a Brand
When choosing a dry aging brand, look for certain things. It’s important to know how they age their beef and for how long. Also, check if they share details about where they get their beef.
- Clear labeling of aging duration and methods
- Information about beef sourcing and quality control
- Customer reviews and ratings
Brands that are open about these details are usually more reliable and focused on quality.
Seasonal Availability of Cuts
The availability of dry aged cuts can change with the seasons. This is because of things like cattle feed cycles and demand. Knowing this can help you plan your purchases and expect price changes.
For example, grass-fed beef might be easier to find at certain times. This can affect the availability and price of dry aged grass-fed products.
Integrating Dry Aged Steak into Meal Planning
Adding dry aged steak to your meals can make dining more exciting without spending a lot. You can do this by smartly buying and preparing dry aged beef.
Incorporating into Weekly Meals
Buying bigger cuts and cutting them yourself can save money. It lets you enjoy dry aged steak in different ways all week. For example, use a big cut for dinner one night and then in stir-fries, sandwiches, or salads on other days.
Also, watch for sales at your local butcher or grocery store. Buying dry aged steak when it’s on sale can help you have it for future meals.
Tips for Meal Prep with Dry Aged Cuts
It’s important to portion and freeze dry aged steak right to keep its quality. Cut the steak into smaller pieces and use vacuum sealing to keep it fresh. Label each piece with the date and what’s inside, and freeze it at 0°F (-18°C) or below.
To thaw a frozen piece, put it in the fridge or thaw it quickly in cold water. Reheat it gently, like in a low oven or sous vide machine, to keep it tender and flavorful.
| Meal Prep Technique | Description | Benefits |
|---|---|---|
| Portioning | Divide larger cuts into smaller, usable portions. | Saves time and reduces waste. |
| Vacuum Sealing | Seal portions in airtight bags to prevent freezer burn. | Preserves flavor and tenderness. |
| Gentle Reheating | Reheat frozen steak using low-temperature methods. | Maintains the steak’s quality and texture. |
By using these tips, you can enjoy dry aged steak more often without overspending. Whether you’re cooking for one or a family, it can become a key part of your cooking.
Sustainable Practices in Meat Sourcing
Exploring dry aged beef means looking at its environmental and ethical sides. The way beef is raised affects the planet, animal care, and the meat’s quality.
Importance of Sourcing Responsibly
Choosing meat from responsible sources is key. Look for suppliers who care about animal welfare, the environment, and fair work. Certifications like “Certified Angus Beef” or “American Grassfed Association” show the beef meets quality and sustainability standards.
Key factors to consider when sourcing dry aged beef include:
- Feed type (grass-fed vs. grain-fed)
- Breeding practices
- Animal welfare standards
- Environmental impact of farming practices
Impact of Dry Aging on Sustainability
Dry aging focuses on quality over quantity, leading to less waste. It encourages a more thoughtful way of eating meat.
| Aspect | Conventional Aging | Dry Aging |
|---|---|---|
| Product Loss | Minimal | Significant trimming |
| Consumer Behavior | Often quantity-oriented | Quality-focused |
| Environmental Impact | Higher waste | Lower waste, more mindful |
Choosing dry aged beef from sustainable producers lets you enjoy your steak. It also supports eco-friendly farming.
Conclusion: Mastering the Art of Cooking Dry Aged Steak
Now you know how to cook dry aged steak. It’s time to try it out. Cooking this meat well means paying close attention to every step, from picking the right cut to serving it just right.
Key Takeaways
You’ve learned the basics. Choosing good meat, preparing it right, and cooking it to perfection are key. You also know how to make it taste even better by searing and resting it.
Continuing Your Steak Journey
Keep improving by trying different cuts, aging times, and cooking ways. Experiment with sides and wines to find your favorite pairings. As you cook more, you’ll love the unique flavors of dry aged steak even more.
Follow these tips and keep practicing. Soon, you’ll make dry aged steak as good as the best steakhouses. Your cooking adventure is just starting, and there’s so much to explore.
FAQ
What is dry aged steak, and how is it different from regular steak?
How do I cook dry aged steak to perfection?
What is the best way to cook dry aged steak?
How long should I rest dry aged steak after cooking?
Can I dry age steak at home, and what equipment do I need?
How do I store leftover dry aged steak?
What are some common mistakes to avoid when cooking dry aged steak?
How do I reheat dry aged steak without losing its quality?
What are some recommended side dishes and wine pairings for dry aged steak?
How do I choose the right cut of dry aged steak?
For more cooking tips, stay connected with us. We also recommend the cookbook Skinnytaste Simple: Easy, Healthy Recipes with 7 Ingredients or Fewer
For more Recipes about Beef?
Did You try our recipe ?
There are no reviews yet. Be the first one to write one.