Dry Age at Home: Your Step-by-Step Guide to Flavorful Steak Perfection
Table of Contents
Dry Age at Home: Your Step-by-Step Guide to Flavorful Steak Perfection
Dry aging beef at home requires precision and patience. To achieve flavorful steak perfection, you must carefully control temperature and humidity levels throughout the process. By following this step-by-step guide diligently, you can savor the exceptional taste and tenderness that come with dry-aged steaks. Mastering the art of dry aging at home will elevate your culinary skills and impress even the most discerning steak connoisseurs.
Imagine enjoying a perfectly cooked steak, with flavors that are rich and tender. You don’t need to be a pro chef or have a fancy butcher to make it happen. With some guidance, you can dry age meat at home like a pro.
Dry aging is an old technique that makes beef taste better by drying it out. By doing it at home, you can make your cooking better and enjoy great steaks without spending a lot.
Key Takeaways
- Learn the science behind dry aging and how it enhances meat flavor and tenderness.
- Discover the necessary equipment for dry aging at home.
- Follow step-by-step instructions for dry aging your own meat.
- Troubleshooting tips to ensure your success in dry aging.
- Tips on selecting the right cuts of meat for dry aging.
Understanding Dry Aging
Dry aging is more than just preserving meat; it’s an art that makes meat taste better and feel softer. To dry age at home, you need to know the basics of this unique process.
What is Dry Aging?
Dry aging means storing meat in a special way. It lets natural enzymes break down proteins and fats. This makes the meat taste more complex and feel tender.
This process needs careful control over temperature, humidity, and air flow. The right conditions help the meat lose moisture, focusing its flavors.
Benefits of Dry Aging
Dry aging offers many advantages:
- Enhanced Flavor: It makes the meat’s natural flavors stronger by removing moisture.
- Tenderization: The meat becomes softer and more enjoyable to eat.
- Unique Umami Notes: It creates special umami tastes that other cooking methods can’t match.
These benefits come together to offer a rich and complex taste experience.
The Science Behind Dry Aging
The science of dry aging involves how meat changes biologically. Proteins break down into smaller parts, making the meat tender and flavorful. Beneficial mold on the surface also adds to the taste.
Oxidation is key to creating the meat’s distinctive nutty and funky flavors. Knowing this helps in getting the best results when aging meat at home.
Choosing the Right Meat
To age beef at home, you need to pick the right cuts. The right cut can make your dry aging better, giving you tastier and tenderer meat.
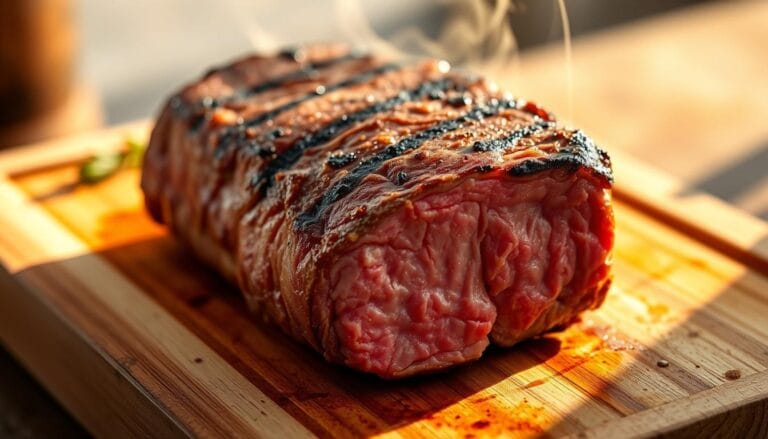
Cuts of Meat Ideal for Dry Aging
Look for large, well-marbled cuts with fat caps for dry aging. Cuts like ribeye, strip loin, and sirloin are great. Their fat and muscle structure help in aging well.
Ribeye is a top choice for dry aging because of its marbling and tenderness. The fat cap on a ribeye helps it age evenly. Strip loin and sirloin also offer a good mix of tenderness and flavor.
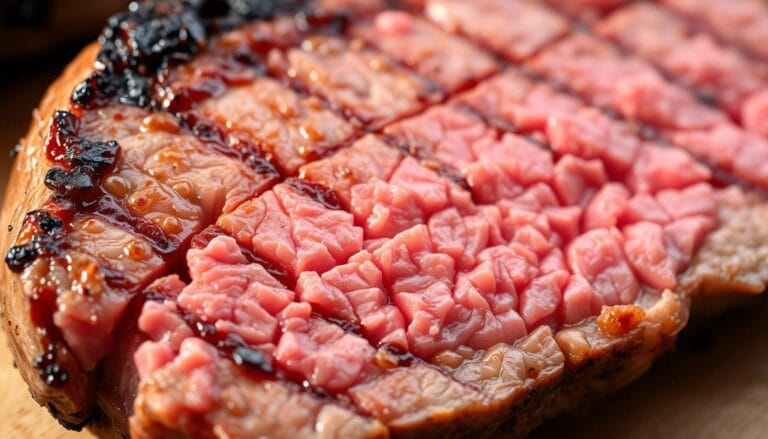
Freshness and Quality: What to Look For
When buying meat for aging, check its freshness and quality. Look for a deep red color, which means it’s fresh and has a lot of myoglobin. The marbling should be even, which makes the meat tender and flavorful.
As meat experts say, “Starting with high-quality meat is key for dry aging.” Consider the meat’s origin and the cattle breed, as they affect the flavor. For example, dry aging Wagyu beef gives a rich, buttery taste because of its marbling.
Building a good relationship with your local butcher is helpful. They can guide you on the best cuts and help pick fresh, high-quality meat. The quality of your meat affects your dry aging results.
Essential Equipment for Dry Aging
Dry aging at home starts with the right tools. To get that perfect, tender, and flavorful steak, you need the correct equipment. You can dry age steak at home in two main ways: using dry aging bags or a dedicated dry aging fridge.
Dry Aging Bags vs. Dry Aging Fridge
Dry aging bags, like UMAi Dry Aging Bags, are a convenient option. They let moisture out while keeping contaminants out. This makes them great for those with little space.
A dedicated dry aging fridge, on the other hand, offers precise control over temperature and humidity. This is key for dry aging. It’s the choice of serious enthusiasts who want to invest in a specialized appliance.
| Feature | Dry Aging Bags | Dry Aging Fridge |
|---|---|---|
| Space Efficiency | High | Low |
| Temperature Control | Limited | Precise |
| Humidity Control | Limited | Precise |
| Cost | Low | High |
Experts say, “The key to successful dry aging is maintaining the right environment.”
A well-controlled environment is key to prevent spoilage and get the right flavor.
Recommended Tools for the Process
Several tools are vital for dry aging. You’ll need accurate thermometers and hygrometers to check the environment. Also, proper cutting boards and knives for trimming, and food-safe sanitizing products to keep things clean.
- Accurate thermometer and hygrometer
- Cutting boards and knives
- Food-safe sanitizing products
With the right equipment and techniques, you can make tender and flavorful steaks at home.
Preparing Your Space for Dry Aging
To dry age beef at home, you need the right space. You must control temperature, humidity, and air flow. This setup helps the aging process and keeps the meat fresh.
Ideal Temperature and Humidity Levels
Temperature is key when aging meat. The best range is 34-38°F (1-3°C). This slows down bacteria and improves flavor and tenderness.
Humidity is also important. It should be between 75-85%. Too much humidity can cause bad bacteria. Too little can make the meat dry out. Getting the humidity right helps the meat dry evenly.
Proper Ventilation Requirements
Good air flow is vital for dry aging. It prevents mold and ensures even drying. Use fans or make sure air can move around the meat.
If you’re using a fridge, create a special area. Use containers that let air through, fans, or dry aging equipment. Keeping everything clean is also important for safety.
Here are some tips for setting up your space:
- Make sure your fridge or aging unit is at the right temperature.
- Keep an eye on humidity and adjust as needed.
- Use a ventilation system or fans for better air flow.
- Regularly clean your tools and containers.
By managing these factors, you can age meat at home. This will make your meat more flavorful and tender.
How to Dry Age Meat at Home
Dry aging meat at home is easy but needs careful attention and patience. To get the best results, you must understand the steps and keep an eye on your meat.
Step-by-Step Dry Aging Process
First, prepare your meat for dry aging. Pat it dry with paper towels to remove moisture. This step is key to prevent bacteria growth.
Next, put the meat on a wire rack or tray. Make sure it doesn’t touch any surfaces for even air flow. If using a dry aging bag, follow the instructions for sealing. For a fridge, place the meat to allow air flow. Keep the temperature between 34°F and 39°F and humidity at 30% to 50%.
Here’s a summary of the initial steps in a table format:
| Step | Description |
|---|---|
| 1 | Pat dry the meat with paper towels |
| 2 | Place the meat on a wire rack or tray |
| 3 | Seal the meat in a dry aging bag or place it in a dry aging fridge |
Monitoring Meat Throughout the Aging Process
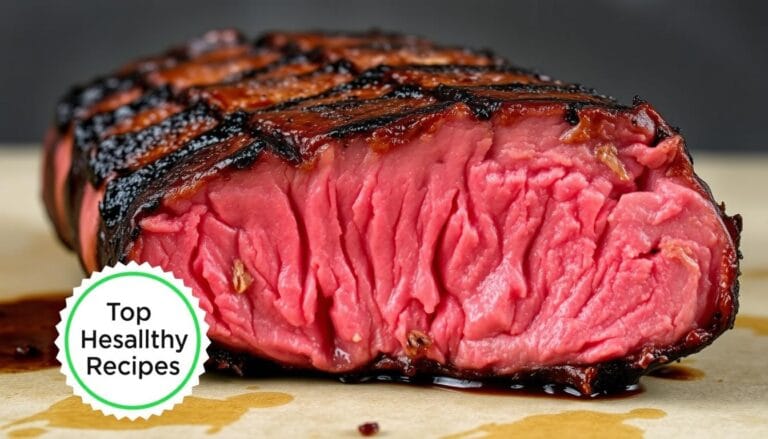
Check your meat daily to ensure it ages right. Look for mold or spoilage. Some mold is okay, but remove it. Also, monitor weight loss, aiming for 10% to 15%.
As you watch your meat, notice color and smell changes. It might get a concentrated beefy flavor and darker. But, if it smells bad or feels slimy, throw it away.
“The art of dry aging is not just about letting meat sit; it’s about creating an environment that fosters the development of complex flavors and tender textures.”
To age evenly, rotate the meat. Rotate it every few days, depending on your setup. Keep an eye on temperature and humidity. Any big changes can harm the meat’s quality. For more on the environment, see Section 5: Preparing Your Space for Dry Aging.
By following these steps and monitoring your meat, you can get professional results at home. Remember, patience is key. The process can take weeks to months.
Common Mistakes to Avoid
Starting dry aging at home can be exciting, but it’s important to know the common mistakes. Dry aging needs careful attention to get the right flavor and tenderness.
Overlooking Cleanliness
Cleanliness is key in dry aging. Any contamination can ruin the aging process. Sanitizing your aging environment and using clean tools are musts. A clean space stops unwanted bacteria and mold, helping your meat age right.
Ignoring Aging Time Recommendations
The aging time is vital for flavor and texture. Ignoring recommended aging times can lead to under-aged or over-aged meat. Each cut of meat has its best aging time. Sticking to these times is key for the best taste.
| Common Mistake | Consequence | Prevention |
|---|---|---|
| Overlooking Cleanliness | Contamination and spoilage | Sanitize environment and tools |
| Ignoring Aging Time | Under or over-aged meat | Follow recommended aging times |

Enhancing Flavor During Dry Aging
Make your dry aging better by trying different seasonings and aging times. When you dry age steak at home, you can play with flavors and textures. This makes your cooking experience special and unique.
Seasonings can make your dry-aged steak taste even better. You can put herbs, spices, or aromatics on the meat or in the aging area. For instance, rosemary, thyme, and peppercorns are great choices. But, don’t use too much because it can hide the steak’s natural taste.
Adding Seasonings
It’s important to find the right amount of seasonings. You want to add flavor without covering up the steak’s taste. Start with a little seasoning and adjust as needed. Some good mixes include:
- A mix of garlic, black pepper, and thyme
- A blend of paprika, coriander, and cayenne pepper
- A simple mix of kosher salt and black pepper
Experimenting with Different Aging Periods
The aging time affects how your steak tastes. A shorter time, like 14 days, gives a milder flavor. But, a longer time, like 45+ days, makes the flavor stronger and funkier. Try different times to find the flavor and texture you like best.
With a steak dry ager, you can watch the aging closely and change the time if needed. This lets you fine-tune your dry aging skills. By picking the right seasonings and aging time, you can make an amazing dry-aged steak.
The Role of Time in Dry Aging
Time is key when dry aging meat at home. How long you age the meat changes its tenderness and taste.
Initial vs. Extended Aging
Dry aging has two main parts: tenderizing and flavor building. The initial tenderization phase happens in the first 14 to 21 days. It breaks down the meat, making it softer.
Then, the flavor development phase kicks in. This is when the meat gets its deep, rich flavors. It makes the meat taste even better.
Recommended Aging Times for Different Cuts
Meat types vary in how they age. Fattier cuts like ribeye can age longer, up to 45 days. This makes them taste richer.
Leaner cuts, like tenderloin, age faster. They age for 14 to 21 days. This keeps their flavor subtle.
| Cut of Meat | Recommended Aging Time | Characteristics |
|---|---|---|
| Ribeye | 30-45+ days | Thick, fatty, rich flavor |
| Tenderloin | 14-21 days | Lean, tender, subtle flavor |
| New York Strip | 21-28 days | Balanced tenderness and flavor |
Knowing how time affects different meats helps you plan better. You can aim for the perfect aging time and flavor.
Storing Your Aged Meat
After aging your meat, it’s key to store it right to keep its quality and taste. Good storage means your hard work will pay off with a tasty, tender meal. You’ve put time and effort into dry aging, so now it’s time to keep that quality.
Best Practices for Storing Aged Meat
When storing your aged meat, think about a few important things. First, trim the hard crust or pellicle that forms. This step helps you get more meat and keeps the quality high.
For short-term storage, wrap the meat to stop it from drying out. Use airtight wrapping or vacuum-sealed bags to keep moisture in and out. Also, keep the wrapped meat in the fridge at a steady temperature below 39°F (4°C).
| Storage Method | Ideal Temperature | Storage Duration |
|---|---|---|
| Refrigerator Storage | Below 39°F (4°C) | Up to 5 days |
| Vacuum Sealed Storage | Below 39°F (4°C) | Up to 2 weeks |
| Freezer Storage | 0°F (-18°C) or below | Up to 6 months |
How to Freeze Aged Meat for Longevity
Freezing is great for keeping your aged meat fresh for longer. Here’s how to freeze it:
- Wrap the meat tightly in plastic wrap or aluminum foil, or use vacuum-sealed bags to prevent freezer burn.
- Label the packages with the date and contents, so you can easily identify them later.
- Store the wrapped meat in the freezer at 0°F (-18°C) or below.
Freezing stops the aging process, so you don’t have to worry about it continuing. By following these tips, you can enjoy your dry-aged meat at its best whenever you’re ready.
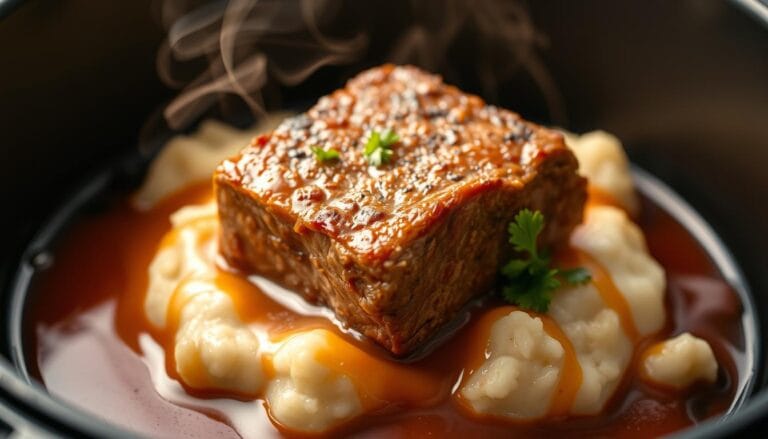
Cooking Techniques for Aged Meat
To enjoy your dry-aged beef, you need the right cooking methods. Aged meat cooks differently because it has less moisture. It’s best to use simple cooking methods that bring out its flavor.
Recommended Cooking Methods
High-heat cooking is best for aged meat. It keeps the meat’s special qualities. Try cast iron searing, broiling, or grilling. These methods quickly seal in juices and flavors.
- Cast Iron Searing: Sear the meat in a hot skillet to create a crust. This keeps the inside tender.
- Broiling: Broiling cooks the meat fast, perfect for thin cuts.
- Grilling: Grilling adds a smoky taste, making the meat even more flavorful.
Remember the internal temperature when cooking aged meat. Many like to cook it to a lower temperature. This keeps it tender and flavorful.
Aged meat’s strong flavors go well with many sides and sauces. Try roasted veggies like asparagus or Brussels sprouts. Or, add a touch with compound butters or light wine reductions.
“The key to pairing sides and sauces with aged meat is to balance and complement its rich flavors without overpowering them.”
Here are some great pairings:
- Roasted veggies like asparagus or bell peppers
- Compound butters, such as garlic or herb butter
- Light wine reductions or sauces
- Mashed potatoes or roasted root veggies
Using these cooking methods and pairings will make your dry-aged meat shine. It promises a memorable dining experience.
Exploring Popular Dry Aging Brands
Home dry aging has become more popular, leading to many new brands. If you’re starting or improving your dry aging, knowing the products and brands is key.
Many brands are known for their dry aging products. UMAi Dry Bags and SteakAger are favorites among home users. UMAi Dry Bags are a budget-friendly way to age meat in your fridge. SteakAger offers a full solution with their dry aging fridges that control temperature, humidity, and airflow.
Notable Commercial Dry Aging Solutions
For serious dry aging, commercial-grade equipment like the Dry Ager units are top-notch. They have precise temperature control and UV lighting for a perfect aging environment. These units are perfect for those who want restaurant-quality results at home.
“The key to successful dry aging lies not just in the equipment, but in understanding the process and being committed to monitoring it.”
Comparing At-Home Options vs. Commercial Options
At-home and commercial dry aging solutions have different features. At-home options like UMAi Dry Bags and SteakAger units are for personal use and are more affordable. Commercial solutions, used in professional kitchens, have advanced features and larger capacities but cost more.
Choosing between at-home and commercial solutions depends on your commitment, space, and budget. For most, at-home solutions are a convenient and affordable way to enjoy dry-aged meats.
- At-Home Options: More affordable, convenient for personal use, and available in various sizes.
- Commercial Options: Offer advanced features, larger capacities, and are designed for heavy-duty use in professional settings.
Knowing the different options and their benefits helps you choose the right one for your dry aging needs.
Troubleshooting Common Issues
When you dry age meat at home, knowing how to fix problems quickly is key. Dry aging can face challenges like spoilage, uneven aging, and off-flavors. Learning to solve these issues is essential for success.
Identifying Spoilage vs. Flavors
Distinguishing between spoilage and good flavors is critical in dry aging. Spoilage shows as excessive mold growth beyond the expected white or light gray mold, sliminess, or a bad smell. This smell is different from the earthy or nutty aroma of aged meat.
To tell spoilage from aging, watch your meat closely. Look for visual cues like color changes and odor differences. Good aged meat smells beefy. A bad smell means it might be spoiled.
Here are signs and their possible causes to watch for:
- Excessive Mold Growth: High humidity or poor air circulation.
- Case Hardening: Too low humidity, causing the exterior to dry too quickly.
- Uneven Aging: Inconsistent temperature or humidity levels.
- Off-Flavors: Contamination or incorrect aging time.
Solutions for Common Dry Aging Problems
Changing your aging environment can solve many problems. For too much mold, try improving air circulation or reducing humidity. If meat dries too fast, increase humidity.
Here’s a table to help you adjust for common issues:
| Symptom | Likely Cause | Solution |
|---|---|---|
| Excessive Mold | High Humidity | Reduce Humidity, Improve Air Circulation |
| Case Hardening | Low Humidity | Increase Humidity |
| Uneven Aging | Inconsistent Temperature/Humidity | Stabilize Environment Conditions |

Nutritional Benefits of Aged Meat
It’s important to know the nutritional benefits of aged meat, like when you dry age beef at home. This process doesn’t just make the meat taste better. It also changes its nutritional content.
Protein and Nutrient Content
Dry aging makes meat’s protein content more concentrated because it loses moisture. But, the nutrients in the meat stay mostly the same, with only a little loss of vitamins. Here’s a table that shows the main changes in nutrients.
| Nutrient | Pre-Aging | Post-Aging |
|---|---|---|
| Protein | High | More Concentrated |
| Vitamins | Present | Minimally Reduced |
| Fats | Variable | Some Beneficial Oxidation |
How Dry Aging Affects Flavor Profiles
The dry aging process makes meat taste better by breaking down proteins into amino acids and peptides. This gives the meat a rich umami flavor. The fats in the meat also change, adding nutty and funky tastes.
By dry aging beef at home, you’re not just improving its taste. You’re also making it more nutritious because the nutrients become more concentrated.
Sharing the Experience
Sharing your dry-aged steaks with others is the final step in mastering how to dry age steak at home. It’s about creating a memorable dining experience that showcases your culinary skills.
To start, let’s look at some tips for serving aged meat. Slicing your steak against the grain is key, as it makes the meat tender and juicy. Serving temperature is also vital; aim for a temperature that’s not too hot, as this can overpower the complex flavors developed during the dry aging process.
Tips for Serving Aged Meat
When serving dry-aged steak, consider the overall dining experience. Pair your steak with complementary sides and sauces that enhance, not overwhelm, the meat’s flavor. For instance, a simple garlic mashed potato or a light salad can complement the rich flavors of a dry-aged ribeye.
- Slice against the grain to maximize tenderness.
- Serve at the optimal temperature to preserve flavors.
- Pair with complementary sides and sauces.
Hosting a Dry Aged Meat Tasting
Hosting a dry-aged meat tasting is an exciting way to share your passion with friends and family. Start by selecting different cuts or aging durations to compare side by side. This not only educates your guests on the dry aging process but also highlights the unique characteristics of each cut.
As noted by culinary expert,
“The art of dry aging is not just about the technical process, but also about understanding the nuances of flavor and texture that develop over time.”
When planning your tasting, consider portion sizes, serving sequence, and palate cleansers to ensure a well-rounded experience. A comparative tasting can reveal the subtle differences between various aging periods, such as 14, 21, or 28 days.
| Aging Duration | Flavor Profile | Texture |
|---|---|---|
| 14 Days | Mild, Beefy | Tender |
| 28 Days | Intense, Umami | Very Tender |
By following these guidelines, you’ll be able to share your dry aging achievements in a way that creates memorable culinary experiences for your guests.
Conclusion: The Benefits of Dry Aging at Home
Learning to dry age at home is rewarding. It saves money compared to buying aged meat elsewhere. You can also tailor the aging process to your liking.
By mastering dry aging, you gain a special culinary skill. You can try different aging times and methods. Start simple and get better with practice.
Trying dry aging at home connects you to old food-making ways. It makes you understand your ingredients and cooking better. With patience and care, you can make your food taste amazing. Now, you’re ready to start and enjoy the flavors of dry aging.
FAQ
What equipment do I need to dry age meat at home?
How long should I dry age my steak?
What temperature and humidity levels are ideal for dry aging?
Can I dry age any cut of meat?
How do I know if my meat has spoiled during the aging process?
How do I store aged meat after the aging process?
Can I add seasonings during the dry aging process?
How does dry aging affect the nutritional content of meat?
What’s the difference between dry aging bags and a dry aging fridge?
How often should I check on my aging meat?
For more cooking tips, stay connected with us. We also recommend the cookbook Skinnytaste Simple: Easy, Healthy Recipes with 7 Ingredients or Fewer
For more Recipes about Beef?
Did You try our recipe ?
There are no reviews yet. Be the first one to write one.