Best Chuck Roast Recipe: Tender & Juicy Every Time
Table of Contents
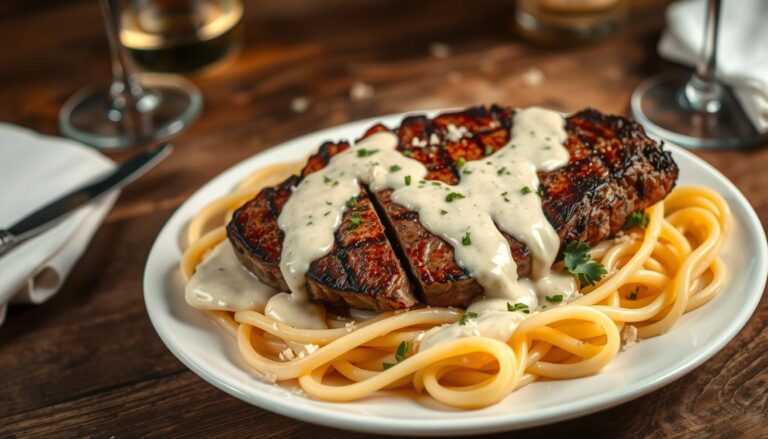
Best Chuck Roast Recipe: Tender & Juicy Every Time
Turning a simple cut of beef into a delicious main dish is easy. With the right steps, you can make a tender and juicy chuck roast that’s as good as any restaurant’s. This affordable cut becomes a star when cooked with care and the right techniques.
Whether it’s for a big Sunday dinner or a weeknight meal, mastering this classic dish will get you lots of praise. The charm of a well-cooked roast is its flexibility. It can be a traditional pot roast or a dish with new flavors that show off your taste.
In this detailed guide, you’ll learn expert tips for picking the best meat, preparing it right, and cooking it perfectly. We’ll look at slow cooking, pressure cooking, and oven roasting to find what works best for you.
The best chuck roast recipe is simple yet impressive. By following our easy steps, you’ll get meat that’s so tender it falls off the fork. It’s surrounded by tasty veggies and a rich gravy. Even if you’re new to cooking, you can make this dish a hit.
Key Takeaways
- Chuck roast becomes most tender when cooked low and slow
- Proper seasoning and browning creates deeper flavor profiles
- Different cooking methods offer flexibility based on your schedule
- Quality meat selection significantly impacts your final results
- The recipe works with various flavor combinations and vegetables
- Leftovers transform beautifully into multiple meals
Introduction to Chuck Roast
Chuck roast is a top choice for comfort food lovers. It’s known for its rich flavor and tender texture. It’s perfect for family dinners or meal prep, all while being budget-friendly.
What is Chuck Roast?
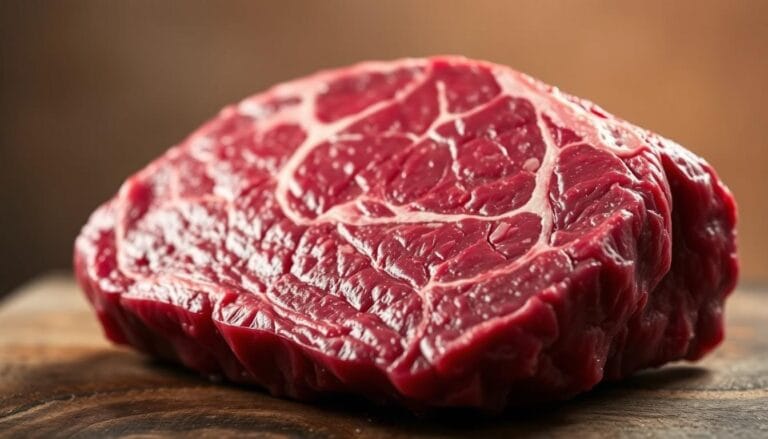
Chuck roast comes from the cow’s shoulder, known as the chuck primal cut. It weighs 3-5 pounds and has lots of fat streaks. This makes it special.
The meat’s connective tissue and collagen make it tough when cooked fast. But slow cooking breaks them down. This makes the meat tender and flavorful. The fat melts, adding extra flavor.
You might see it called “chuck pot roast” or “shoulder steak.” These names all refer to the same area. They all cook the same way.
Benefits of Cooking Chuck Roast
Chuck roast is loved for its affordability and flavor. It’s cheaper than other cuts but tastes amazing. It’s great for feeding a crowd without spending a lot.
Its rich taste comes from the fat and connective tissues. This flavor is hard to beat. It’s perfect for bold seasonings and sides.
It’s also very forgiving. You can cook it for a long time without worrying. This is great for busy days.
Popular Cooking Methods
Slow cooking is the most popular way to cook chuck roast. It’s done in a slow cooker or crockpot for 8-10 hours. This breaks down the meat completely.
Braising is another great method. It involves searing the meat and then cooking it in liquid in the oven. This takes 3-4 hours and makes the meat tender.
Pressure cooking is also popular. It uses appliances like Instant Pots to cook the meat fast. A slow cooker’s 8 hours can be cut to 90 minutes.
Each method has its own benefits. You can choose based on your schedule and taste preferences.
Ingredients for a Perfect Chuck Roast
Creating the best chuck roast recipe starts with knowing the key ingredients. Having everything ready before you start cooking makes the process smoother. Let’s look at the essential ingredients that make a delicious chuck roast.
Essential Ingredients
A 3-4 pound chuck roast is at the heart of your dish. It should have good marbling for tenderness and flavor.
You’ll need 1-2 tablespoons of high-heat cooking oil like vegetable or canola oil for searing. Salt and freshly ground black pepper are must-haves. Plan for about 1 tablespoon of kosher salt and 1-2 teaspoons of pepper.
The aromatic base includes 2 medium onions, 3-4 carrots, and 2-3 celery stalks. This mix, known as mirepoix, infuses the meat with flavor.
Lastly, 2-3 cups of beef broth are needed for braising. Use low-sodium broth to control the dish’s saltiness.
Optional Add-ins for Flavor
Optional add-ins can make your dish even better. A half cup of dry red wine adds depth and complexity. The alcohol cooks off, leaving rich flavors.
Two tablespoons of tomato paste introduce umami and sweetness. A tablespoon of Worcestershire sauce adds tangy, savory notes.
Adding 8 ounces of mushrooms like cremini, button, or shiitake is a great idea. They soak up juices and add earthy notes. For sweetness, add 2-3 cloves of minced garlic or a tablespoon of brown sugar.
Recommended Seasonings and Herbs
The right seasonings and herbs can make your chuck roast unforgettable. Classic herb combinations like thyme, rosemary, and bay leaves work well with beef.
For a smoky touch, try 1-2 teaspoons of smoked paprika. A teaspoon of cumin adds warmth. Italian herb blend or crushed red pepper flakes can also enhance the flavor.
Herbs like thyme and rosemary infuse the meat with oils. Spices like paprika and cumin add complexity to the sauce.
| Flavor Profile | Recommended Herbs | Recommended Spices | Complementary Add-ins |
|---|---|---|---|
| Traditional | Thyme, Rosemary, Bay Leaf | Black Pepper, Garlic Powder | Onions, Carrots, Celery |
| French-Inspired | Herbes de Provence, Parsley | White Pepper, Nutmeg | Red Wine, Mushrooms |
| Southwestern | Oregano, Cilantro | Cumin, Chili Powder, Paprika | Tomatoes, Bell Peppers |
| Italian | Basil, Oregano, Parsley | Garlic, Red Pepper Flakes | Tomato Paste, Red Wine |
Seasonings should enhance the meat’s natural flavor. Start with moderate amounts and adjust to taste. The best chuck roast recipe lets the meat shine while being improved by chosen ingredients.
Preparing Your Chuck Roast
Getting your chuck roast ready is key to a great meal. The steps before cooking make it tender and flavorful. With the right selection, seasoning, and searing, your beef will impress everyone.
Choosing the Right Cut
Choosing the right cut of meat is important. Look for marbling, color, and thickness. Marbling adds flavor, a fresh color means it’s good, and thickness ensures even cooking.
Trimming is also important. Remove big fat caps but keep some fat for moisture. This keeps your roast juicy without being greasy.
Seasoning Your Chuck Roast
Seasoning adds flavor to your chuck roast. You can use dry rubs or wet marinades. A basic dry rub includes:
- 2 tablespoons kosher salt
- 1 tablespoon black pepper
- 2 teaspoons garlic powder
- 1 teaspoon dried herbs (rosemary, thyme, or oregano)
Wet marinades go deeper into the meat. They work best with more time to prepare:
The secret to a great marinade is the balance of acid, oil, and aromatics. The acid tenderizes, the oil carries flavor, and the aromatics provide complexity that makes your chuck roast memorable.
Season your chuck roast at least 40 minutes before cooking. This lets salt penetrate and tenderize the meat. Seasoning the night before and refrigerating it uncovered enhances flavor and promotes better browning.
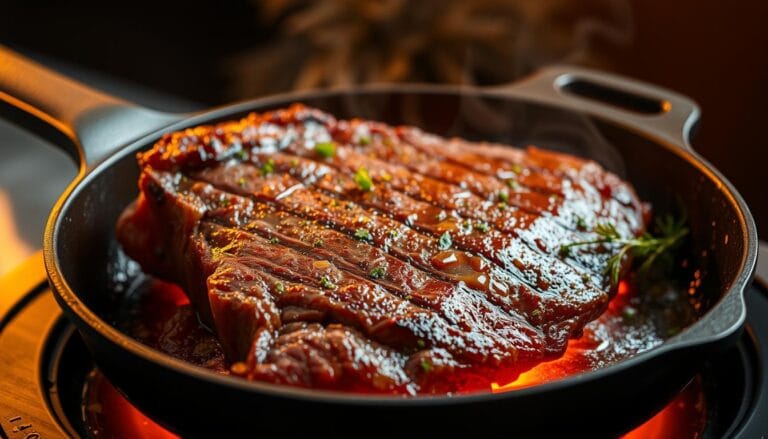
Searing Techniques for Flavor
Searing is about flavor, not just looks. The Maillard reaction creates new flavors when proteins and sugars meet high heat. This reaction gives seared meat its savory taste.
There are several ways to sear your chuck roast:
| Searing Method | Equipment Needed | Best For | Tips for Success |
|---|---|---|---|
| Cast Iron Skillet | Heavy cast iron pan | Smaller roasts (3-4 lbs) | Heat pan until smoking before adding meat |
| Dutch Oven | Enameled cast iron pot | One-pot cooking | Sear in the same pot you’ll braise in |
| Oven Broiler | Broiler-safe pan | Larger roasts | Position 6 inches from heat source |
| Outdoor Grill | Gas or charcoal grill | Adding smoky flavor | Use direct high heat zone |
Follow these tips for perfect searing:
1. Pat the meat dry before searing. Moisture stops browning.
2. Use high heat and don’t overcrowd the pan. Give your chuck roast space.
3. Don’t move the meat too much. Let it sear for 3-4 minutes before checking.
4. Use tongs to turn the meat. This keeps juices inside.
If you get smoke, use oils like grapeseed or avocado. Chilling your roast before searing helps get an even crust.
With the right cut, seasoning, and searing, you’re set for a great meal. These steps may seem simple, but they make all the difference.
Cooking Methods for Chuck Roast
Choosing the right cooking method is key to making your chuck roast shine. Each method has its own benefits, making your meal unforgettable. Whether you have hours to spare or need dinner fast, there’s a perfect way to cook your chuck roast.
The secret to a great chuck roast is breaking down tough tissues into tender, gelatinous meat. This process makes the meat melt in your mouth. Let’s look at the three best ways to achieve this.
Slow Cooker Method
The slow cooker method is perfect for busy days. It lets you cook your chuck roast while you’re away. Just start it in the morning and come home to a ready-to-eat meal.
Slow cookers use gentle heat to break down the meat over time. This makes the meat tender and creates a flavorful broth. It’s a hands-off way to cook that’s full of flavor.
“The slow cooker is the busy parent’s secret weapon. Nothing beats coming home to the aroma of a perfectly cooked chuck roast that’s been simmering all day without any babysitting.”
You only need a slow cooker with a tight lid. Timing is key, as it takes 8-10 hours on low for the best results. This method is the most hands-off but delivers great flavor.
Oven Braising Method
Oven braising is a traditional way to cook chuck roast. It offers even heat for better flavor. You get a beautiful crust on the meat, adding depth to your dish.
Oven heat circulates around your pot, ensuring even cooking. This method is great for developing rich flavors. The result is a flavorful pot roast with a rich sauce that sticks to the meat.
You’ll need a Dutch oven or heavy pot with a tight lid. The main benefit is the browning and caramelization. This creates layers of flavor not possible in a slow cooker. It requires more attention while cooking.
Instant Pot Method
The Instant Pot method is a mix of speed and tenderness. It cooks the meat quickly while breaking down tough tissues. This is perfect for those who want a fast dinner.
Pressure cooking forces moisture into the meat, making it tender. The sealed environment keeps moisture in, making the meat juicy. You can have a tender chuck roast in about 60-90 minutes, much faster than other methods.
All you need is an Instant Pot or similar electric pressure cooker. The quick cooking time means flavors don’t develop as much. So, using more aromatic ingredients is key.
| Cooking Method | Total Time | Active Time | Best For | Flavor Development |
|---|---|---|---|---|
| Slow Cooker | 8-10 hours | 20 minutes | Busy weekdays | Good |
| Oven Braising | 3-4 hours | 45 minutes | Weekend cooking | Excellent |
| Instant Pot | 60-90 minutes | 30 minutes | Last-minute meals | Good with proper seasoning |
Each method has its own strengths. The slow cooker is great for convenience, oven braising for flavor, and the Instant Pot for speed. Your choice depends on your schedule, equipment, and desired outcome.
In the next sections, we’ll provide step-by-step guides for each method. These guides will help you master each technique and adapt them to your preferences.
Making the Best Chuck Roast: Slow Cooker Setup
Setting up your slow cooker is key to a delicious chuck roast. It’s easy and makes the meat tender and flavorful. This method is perfect for the best chuck roast recipe.
Layering Ingredients
Layering in your slow cooker is more than looks. It’s about building flavor from the bottom up. Start with a base of aromatics for a flavorful start.
Place chopped onions, carrots, and celery at the bottom. These veggies prevent sticking and add flavor. They’re like a natural flavor base.
Next, put your seared chuck roast on top. Searing is important for a flavorful crust that gets better with slow cooking.
Then, add your cooking liquid. Use beef broth or red wine, or both. Keep the liquid halfway up the roast. For a 3-pound roast, use 1-2 cups of liquid.
- Bottom layer: Aromatic vegetables (onions, carrots, celery)
- Middle layer: Seared chuck roast
- Top layer: Liquids and additional seasonings
Add seasonings, herbs, or garlic on top. Fresh herbs like rosemary and thyme add flavor as they cook.
Don’t overfill your slow cooker. Aim for two-thirds full. Different models hold liquid differently, so adjust as needed.
Cooking Time and Temperature
The slow cooker’s magic is in its low, steady heat. You have two main options for cooking chuck roast:
LOW setting (8-10 hours): This method makes the meat tender and fall-apart. The slow heat breaks down tough tissues for a melt-in-your-mouth texture.
HIGH setting (4-5 hours): For a quicker option, the high setting works too. The meat might not be as tender as the low setting, though.
Choose based on your schedule and preference. The LOW setting is great for mornings. The HIGH setting is better for a weekend dinner.
Don’t open the lid too often. Each peek can add 20-30 minutes to cooking time.
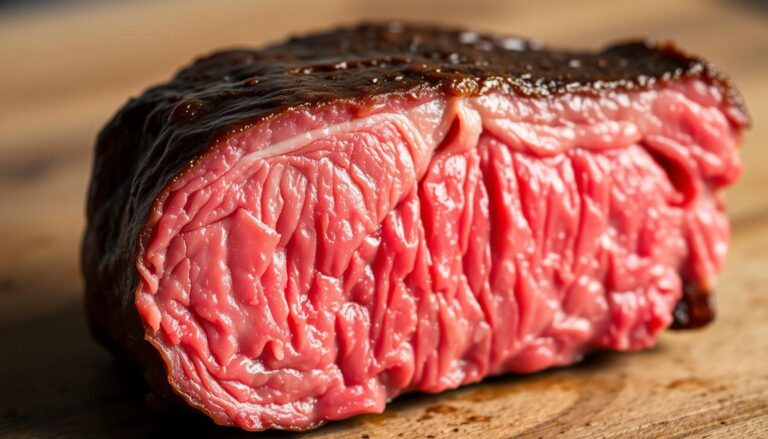
How to Check Doneness
Checking if your chuck roast is done is important. Use these methods:
Temperature test: A meat thermometer is best. Look for 195-205°F for tender meat. This breaks down collagen for a tender texture.
Fork test: Stick a fork into the thickest part. If it twists easily, it’s done. If not, cook more.
Visual cues: A done roast will have shrunk and look moist. It should be darker than before.
Excess liquid is normal. If you want a thicker sauce, thicken the liquid with a cornstarch slurry.
If your roast is not tender enough, cook longer. Chuck roast gets more tender with time, up to a point.
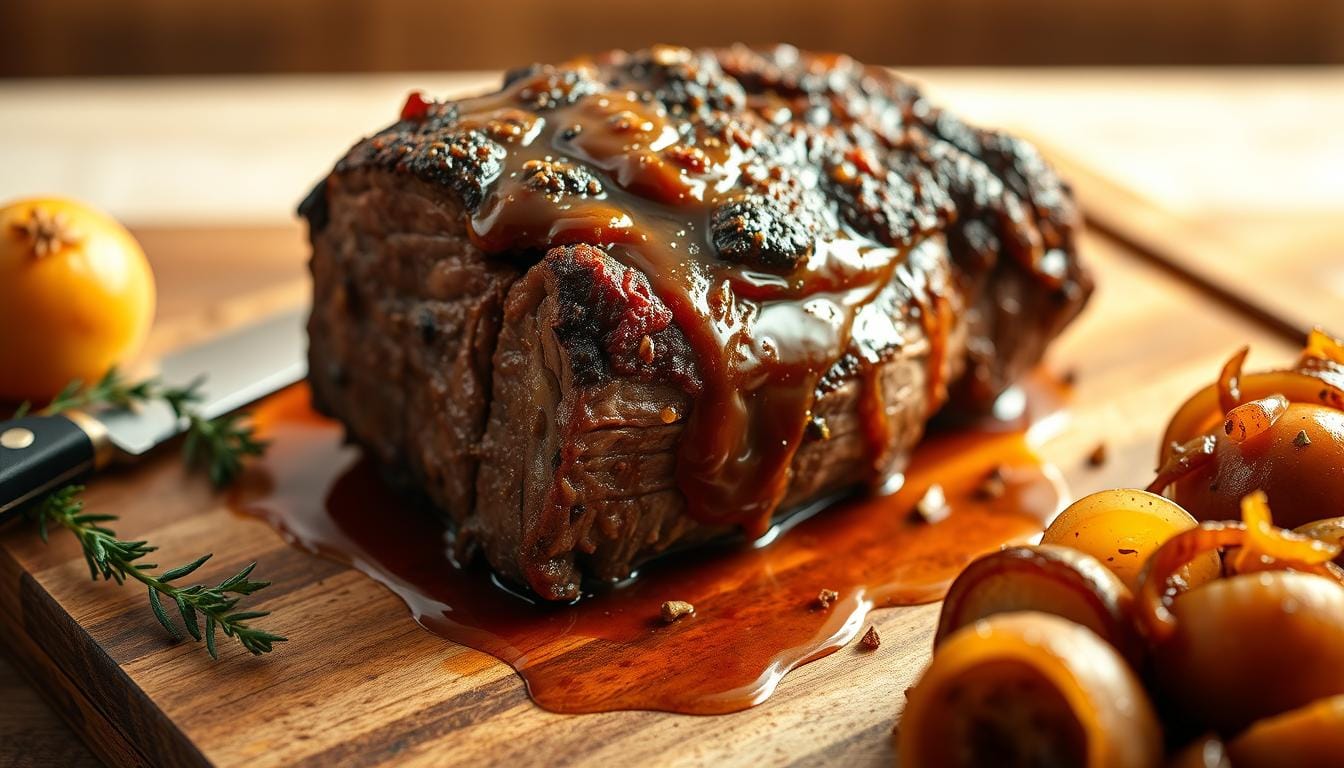
Oven Braising Chuck Roast
Oven braising is a foolproof way to get a restaurant-quality beef chuck roast. It uses both dry and moist heat to make the meat tender. The result is a roast that’s tender on the inside and juicy on the outside, perfect for impressing guests.
Prepping the Oven
Getting your oven ready is key for the best pot roast recipe. Place the rack in the lower third of the oven for even heat. This way, the top of the roast won’t burn too fast while the bottom cooks well.
Make sure your oven is hot before putting in the roast. A hot oven keeps the temperature steady, which is important for braising. Most beef chuck roast recipes say to preheat for at least 20 minutes.
The right cooking vessel is important. A heavy Dutch oven is best because it keeps heat evenly and holds moisture. If you don’t have a Dutch oven, a covered roasting pan or a deep casserole dish with foil will work too, but cooking times might vary.

Ideal Cooking Temperatures
The secret to a great braised chuck roast is in the temperature. Start by searing the seasoned roast in a vessel on the stovetop. This step creates a flavorful crust through the Maillard reaction, making the dish better.
After searing, put the roast in the oven at about 425°F for 20-30 minutes. This high heat helps create deep flavors that spread through the meat during the longer cooking time.
Then, lower the temperature to 300-325°F for the rest of the cooking. This gentle heat breaks down the tough tissues in the chuck roast, making it tender and juicy.
Suggested Cooking Time
When braising chuck roast in the oven, patience is key. A 3-4 pound roast takes 3-4 hours at the lower temperature. Bigger roasts need more time, about one hour per pound.
The best way to check if the roast is done is by texture. It’s ready when a fork slides in easily. If it’s tough, cook for another 30 minutes and check again.
Once the roast is tender, let it rest in its juices for 15-20 minutes before slicing. This step makes sure the meat stays moist and flavorful.
For extra flavor, spoon some of the braising liquid over the sliced meat before serving. This liquid adds a rich flavor to your beef chuck roast, making it unforgettable.
Instant Pot Chuck Roast Preparation
Instant Pot technology has changed how we cook chuck roast. Now, you can enjoy tender, flavorful meat in just 60-90 minutes. This method keeps the rich taste and soft texture of traditional chuck roast but cuts cooking time in half.
Whether you’re a busy parent or just want to save time in the kitchen, learning to make Instant Pot chuck roast is a game-changer. It makes meal planning easier and faster.
Setting Up Your Instant Pot
To get the best chuck roast recipe results, start by setting your Instant Pot to Manual or Pressure Cook. High pressure is best for tenderizing tough meat.
Make sure your sealing ring is in place and the valve is set to “Sealing.” This is key for building pressure. A common mistake is forgetting this, which stops pressure from building.
After cooking, let the pressure release naturally for 15-20 minutes. Then, manually release any remaining pressure. This slow release keeps the meat tender by avoiding sudden temperature changes.
Time-Saving Tips
To cook faster, cut large chuck roasts into smaller pieces. This ensures even cooking and saves up to 30 minutes. It also makes the meat tender all the way through.
Use the Sauté function to brown your chuck roast before pressure cooking. This step adds flavor in just 2-3 minutes per side. The Instant Pot’s efficiency means you can sear and cook in one vessel, saving on dishes.
While the Instant Pot heats up, prepare your veggies and seasonings. You can also use pre-cut veggies to save time. Some cooks even make “Instant Pot kits” with pre-measured ingredients for quick meals.
| Roast Size | Cooking Time | Pressure Release Time | Total Time | Tenderness Level |
|---|---|---|---|---|
| 2 pounds | 60 minutes | 15 minutes | ~90 minutes | Fork-tender |
| 3 pounds | 70 minutes | 20 minutes | ~105 minutes | Very tender |
| 4 pounds | 80 minutes | 20 minutes | ~115 minutes | Fall-apart tender |
| 5+ pounds | 90 minutes | 25 minutes | ~130 minutes | Extremely tender |
Troubleshooting Common Issues
The dreaded “burn” notice can stop your cooking. It usually happens when there’s not enough liquid or when sauces settle at the bottom. Always have at least 1 cup of thin liquid and deglaze the pot after sautéing to remove stuck bits.
If your chuck roast is undercooked, don’t worry. Just reseal the Instant Pot and cook for 10-15 minutes more until it’s tender. Cooking times can vary based on the meat’s cut, marbling, and temperature before cooking.
Sealing problems can also occur. If your Instant Pot can’t build pressure, check the sealing ring, valve setting, and liquid levels. Sometimes, the silicone ring loses its shape over time. Replacing it annually can help.
For bigger roasts, add 10 minutes of cooking time per pound. This ensures the meat is tender, no matter its size. For a firmer texture, cook for 10-15 minutes less than the recommended time.
Side Dishes to Pair with Chuck Roast
Choosing the right side dishes can make your chuck roast meal unforgettable. A good meal has different textures, flavors, and colors. These add to the rich taste of beef chuck roast. Whether it’s a family dinner or a special event, these sides will make your meal feel like it’s from a restaurant.
Classic French Fries
There’s nothing like chuck roast beef with crispy, golden french fries. The soft meat and crunchy potatoes make a great mix on your plate.
To make traditional french fries, cut russet potatoes into ¼-inch sticks. Soak them in cold water for 30 minutes. This makes them crispy. Dry them well before frying in oil at 325°F for 5 minutes, then at 375°F for the final crisp.
For a healthier option, try oven-baked fries. Toss potato sticks with 1-2 tablespoons of olive oil. Arrange them on a baking sheet and bake at 425°F for 25-30 minutes, flipping halfway. Season with salt right after they’re done.
Creamy Mashed Potatoes
Buttery mashed potatoes are perfect with juicy beef chuck roast. They soak up the meat juices and gravy beautifully.
Choose the right potato for the best mashed potatoes. Russets are fluffy, while Yukon Golds are creamy. Mixing both gives you the best of both worlds.
To avoid soggy potatoes, start them in cold water and boil gently. Drain well and return to the pot for a minute. Then, mash them. Adding warm ingredients like roasted garlic or sour cream makes them richer.
A basic recipe has 2 pounds of potatoes, ½ cup warm milk, 4 tablespoons butter, salt, and pepper. For something special, add 2 tablespoons of fresh herbs like chives or rosemary.
Seasonal Vegetables
Adding colorful vegetables to your plate makes it more nutritious and interesting. Choose vegetables that are in season for the best taste and value.
In winter, try roasting carrots, parsnips, and turnips. They become sweet and pair well with beef. Toss them with olive oil, salt, pepper, and a bit of maple syrup before roasting at 400°F for 25-30 minutes.
Spring brings asparagus and peas. Blanch them for 2-3 minutes, then cool them in ice water. This keeps their color and texture fresh for your meal.
Summer is great for grilling corn, zucchini, and bell peppers. A light char adds smoky flavor that goes well with slow-cooked beef.
Fall vegetables like Brussels sprouts and butternut squash are rich and nutty when roasted. Roasting them with bacon makes Brussels sprouts extra tasty.
Remember, the goal is to enhance your chuck roast, not overshadow it. The best sides offer variety in texture, color, and flavor. This lets the beef be the main attraction.
Bringing Out the Flavor: Making Gravy
Take your chuck roast to the next level with a smooth, velvety gravy. Use the roast’s own drippings to make it. This way, you won’t waste any of the flavorful juices. A well-made gravy captures all the rich flavors developed during slow cooking.
It’s the perfect sauce to drizzle over your meat and side dishes. Let’s explore how to create the perfect gravy to complement your roast.
Simple Gravy Recipe
Making a basic gravy from your chuck roast drippings is easy. Start by collecting the liquid left in your cooking vessel after removing the meat and vegetables. This liquid is full of flavor and is the base of an exceptional gravy.
First, strain the cooking liquid through a fine-mesh sieve into a measuring cup. This removes any solid bits. Let it sit for a few minutes so the fat rises to the top. Skim off most of the fat, keeping about 2 tablespoons for your roux.
In a saucepan over medium heat, whisk together the reserved fat and 2 tablespoons of all-purpose flour. Cook this mixture for 1-2 minutes until it turns light golden brown and smells slightly nutty. This step is important as it gets rid of the raw flour taste.
Gradually whisk in 2 cups of your strained cooking liquid, adding it slowly to prevent lumps. Bring the mixture to a simmer, whisking constantly until it thickens to your desired consistency, usually about 5-7 minutes. Season with salt and pepper to taste.
Variations on Traditional Gravy
Once you’ve mastered the basic gravy technique, try these delicious variations. Each adds a unique flavor profile that can transform your meal.
For a rich red wine gravy, replace ½ cup of the cooking liquid with a good quality red wine. Simmer the wine for a minute before adding the remaining liquid. This allows the alcohol to cook off while concentrating the flavor.
Mushroom gravy adds earthy depth to your chuck roast. Simply sauté 8 ounces of sliced mushrooms in a tablespoon of butter until golden brown, then add them to your finished gravy. For extra flavor, add a teaspoon of fresh thyme leaves.
Onion gravy starts with caramelizing a thinly sliced onion in butter until deeply golden, then proceeding with your standard gravy recipe. The sweet, complex flavor of caramelized onions perfectly complements beef.
For a lighter option, create an au jus by skipping the roux altogether. Simply strain your cooking liquid, skim off the fat, and reduce it by simmering for 10-15 minutes until slightly thickened and intensely flavored.
Tips for Thickening Gravy
If your gravy isn’t reaching your desired thickness, don’t worry. Several methods can help you achieve the perfect consistency without compromising flavor.
A cornstarch slurry works quickly and creates a glossy finish. Mix 1 tablespoon of cornstarch with 1 tablespoon of cold water until smooth, then whisk it into your simmering gravy. Allow it to cook for at least 1 minute to reach full thickening power and eliminate any starchy taste.
For a gluten-free option, arrowroot powder works similar to cornstarch but creates an even more transparent gravy. Use it in the same proportions as cornstarch, but add it at the very end of cooking as prolonged heat can reduce its thickening power.
If your gravy is too thin but intensely flavored, try the reduction method. Simply simmer it uncovered, allowing excess water to evaporate until you reach your desired thickness. This concentrates flavors without adding any thickeners.
Encountering common gravy problems? For overly salty gravy, add a peeled, raw potato chunk and simmer for 10 minutes (remove before serving) to absorb some salt. For greasy gravy, chill it briefly so the fat solidifies on top, then skim it off. For lumpy gravy, blend it with an immersion blender or strain it through a fine-mesh sieve.
Remember that gravy continues to thicken as it cools, so it’s better to err on the slightly thinner side. Your perfectly thickened gravy will be the crowning glory of your chuck roast dinner, tying together all the flavors of your carefully prepared meal.
Storing Leftovers
Cooking a chuck roast yields plenty of leftovers. These can be stored to enjoy delicious meals all week. A well-cooked chuck roast can feed several people, saving time and money. Knowing how to store and reheat leftovers ensures you enjoy your meals fully.
Proper Cooling and Storage Techniques
Keeping leftovers safe is key. The USDA says to refrigerate them within two hours to stop bacteria growth. Cool large portions quickly by dividing them into smaller containers.
Choose the right containers for freshness. Glass containers with tight lids are best as they don’t absorb odors. If using plastic, make sure it’s BPA-free. For freezing, use heavy-duty freezer bags to remove air.
Leftover chuck roast stays good in the fridge for 3-4 days. Freeze it for longer storage. Frozen chuck roast stays good for up to 3 months, safe forever at 0°F.
| Storage Method | Maximum Storage Time | Best Container Type | Temperature | Special Considerations |
|---|---|---|---|---|
| Refrigerator | 3-4 days | Airtight glass container | 40°F or below | Store with some gravy to maintain moisture |
| Freezer | 2-3 months for best quality | Freezer bags or vacuum-sealed | 0°F or below | Label with date and contents |
| Vacuum-Sealed | Up to 6 months | Vacuum bags | 0°F or below | Prevents freezer burn effectively |
| Meal-Prepped Portions | 3-4 days refrigerated | Divided containers | 40°F or below | Include sides for complete meals |
Reheating Tips for Best Results
Reheating chuck roast right is key to keeping it tender and flavorful. The main challenge is avoiding it from drying out.
For microwaving, place sliced chuck roast in a dish with a bit of broth. Cover and heat in 30-second bursts until warm, about 2-3 minutes.
Oven reheating is better for big portions. Preheat to 300°F, add broth, cover with foil, and heat for 15-20 minutes until hot.
Stovetop reheating works well with a skillet and lid. Add broth, simmer, add the roast, cover, and heat on low for 5-7 minutes, turning occasionally.
Creative Leftover Recipe Ideas
Turn leftover chuck roast into new meals your family will love. These ideas use your best chuck roast recipe for more meals.
Make Hearty Beef Sandwiches for a quick lunch. Layer chuck roast, caramelized onions, horseradish, and cheese on bread. Dip in au jus for extra flavor.
Create a Shepherd’s Pie with leftover beef, gravy, veggies, and Worcestershire sauce. Top with mashed potatoes and bake until golden.
Morning hash is a tasty breakfast. Dice the roast, crisp it with potatoes, peppers, and onions. Top with a fried egg for a filling breakfast.
Make a comforting beef and vegetable soup. Simmer the roast with broth, barley, carrots, celery, and herbs. It’s perfect for cold evenings, getting better with time.
Beef tacos are a flavorful way to use leftovers. Shred the roast, warm it with taco seasoning, and serve in tortillas with your favorite toppings. It’s a quick dinner that doesn’t taste like leftovers.
Chuck Roast Variations
Chuck roast is incredibly versatile, allowing you to explore global flavors. It’s a great way to keep your meals exciting and introduce new traditions. These variations keep the meat tender and juicy while taking your taste buds on a journey.
Beef Bourguignon Style
This French-inspired version makes your chuck roast taste like it’s from a fancy restaurant. Chuck roast’s rich marbling and texture make it perfect for this dish.
To make this classic French dish, use red wine to tenderize the meat and add flavor. You’ll also need pearl onions, mushrooms, and bacon for the signature taste.
The slow braising process is key. Sear the seasoned chuck roast, then deglaze the pan with red wine. Add beef broth, thyme, bay leaves, and tomato paste before cooking.
Caramelize the pearl onions and mushrooms in butter, then add them in the last hour. This best pot roast recipe takes 6-8 hours in a slow cooker or 3-4 hours in the oven.
Mexican-Inspired Chuck Roast
Turn your chuck roast into a fiesta with this Mexican-inspired version. It’s perfect for tacos, burritos, or tostadas.
The flavor starts with chipotle peppers in adobo sauce for smoky heat. Add cumin, oregano, and lime juice for an authentic Mexican taste. Diced tomatoes, green chilies, and orange juice add depth.
Start by rubbing the chuck roast with cumin, oregano, salt, and pepper. Sear it, then cook with onions, garlic, tomatoes, chipotle peppers, and citrus juices.
Once tender, shred the roast and return it to the sauce. Serve with tortillas, cilantro, onions, and lime wedges for a meal everyone will love.
Asian Flavored Chuck Roast
This version brings East Asian flavors to your chuck roast. Soy sauce, ginger, star anise, and five-spice powder make it fragrant and umami-rich. It’s great with rice or noodles.
The sauce is a mix of soy sauce, brown sugar, rice vinegar, and sesame oil. Ginger, garlic, and green onions add aroma. Star anise and five-spice powder give it a unique flavor.
Marinate the chuck roast in some sauce for at least 2 hours. Sear it, then add the rest of the ingredients. Beef broth helps with braising.
This version works well in a pressure cooker or Instant Pot, cooking in 60-90 minutes. Top with green onions, sesame seeds, and steamed bok choy for a complete meal.
| Variation | Key Ingredients | Cooking Method | Serving Suggestions | Prep Time |
|---|---|---|---|---|
| Beef Bourguignon | Red wine, pearl onions, mushrooms, bacon, thyme | Slow cooker (6-8 hrs) or Dutch oven (3-4 hrs) | Crusty bread, mashed potatoes | 30 minutes |
| Mexican-Inspired | Chipotle peppers, cumin, oregano, lime, orange juice | Slow cooker (7-8 hrs) or Dutch oven (3 hrs) | Tortillas, rice, beans, fresh toppings | 20 minutes |
| Asian Flavored | Soy sauce, ginger, star anise, five-spice powder | Pressure cooker (60-90 min) or slow cooker (6 hrs) | Rice, noodles, steamed vegetables | 25 minutes |
These variations show how versatile chuck roast is. You can explore global cuisines without learning new cooking techniques. The same cut of beef can take your family on a culinary journey.
By changing the flavors, you can make different meals without repeating yourself. Each version transforms the classic dish, proving chuck roast is incredibly versatile.
Frequently Asked Questions
Let’s answer the most common questions about cooking the perfect chuck roast. This will help your meal be tender and full of flavor every time. Whether you’re new to cooking or want to improve, these tips will help you master your chuck roast recipe.
How do I know when my chuck roast is done?
To check if your chuck roast beef is cooked right, use three methods. The best way is to check the internal temperature with a meat thermometer. Aim for 195-205°F at the thickest part of the roast for that tender feel everyone loves.
Look for visual signs too. If the meat starts to pull away from the bone and shrinks a bit, it’s likely done. It should also have a deep, dark brown color on the outside.

The fork test is another good way. Stick a fork into the center and twist it gently. If it’s easy to shred and feels tender, your roast is ready. It should feel soft, not hard or rubbery.
Can I use frozen chuck roast?
Yes, you can cook chuck roast from frozen, but there are some things to keep in mind. When using a frozen roast, you’ll need to increase your cooking time by about 50%. For example, a roast that takes 4 hours when fresh might need 6 hours from frozen.
While cooking from frozen is safe, thawing first is better. The best way to thaw is in the fridge, giving 24 hours for every 4-5 pounds of meat. This slow thaw helps keep the meat’s quality and texture better.
If you cook from frozen, you can’t sear the meat first. This means you might miss out on some flavor. The seasoning also won’t penetrate as deeply into frozen meat, which could make the dish less flavorful.
How do I adjust the cooking time for larger roasts?
For bigger chuck roasts, you need to adjust cooking time to ensure even cooking. Add about 30-45 minutes of cooking time for each extra pound of meat.
For slow cooker method: A 3-pound roast takes 7-8 hours on low, while a 5-pound roast might need 9-10 hours. Make sure your slow cooker is big enough for the larger cut without overcrowding.
When oven braising, increase cooking time as needed while keeping the same temperature. A 3-pound roast might take 3 hours at 325°F, while a 5-pound roast could need 4-4.5 hours at the same temperature.
For Instant Pot cooking, add about 5-7 minutes per extra pound beyond the recipe’s suggestion. Remember, bigger roasts may need longer natural pressure release times too.
Additional Chuck Roast Questions
Should I brown my chuck roast before slow cooking? Yes, definitely. Browning creates the Maillard reaction, which develops rich flavors that enhance the dish. Take the extra 10 minutes to sear all sides of your roast in a hot pan before putting it in your slow cooker or Dutch oven.
What if my chuck roast recipe produces too much liquid? If your dish has too much liquid, you have a few options. Remove the meat and veggies, then simmer the liquid uncovered until it’s the right consistency. Or, make a slurry with 1 tablespoon cornstarch mixed with 2 tablespoons cold water, then stir this into the hot liquid to thicken it.
Why is my chuck roast tough after cooking? Tough chuck roast usually means it’s undercooked or overcooked. Undercooked roast hasn’t had enough time for the collagen to break down into gelatin. If your roast feels tough but has reached proper temperature, keep cooking for another 30-45 minutes. Overcooked roast becomes dry and stringy, so always check doneness using the methods described earlier.
Can I cook vegetables with my chuck roast? Absolutely! Adding veggies makes a complete one-pot meal. But, think about the cooking time of each veggie. Root veggies like carrots and potatoes can cook with the roast from the start. Softer veggies like peas or green beans should be added in the last 30-60 minutes to avoid overcooking.
Additional Recipe Inspirations
There’s more to cooking than just chuck roast. The skills you’ve learned with your best chuck roast recipe are a great starting point. You can explore other cuts, flavors, and ingredients. Let’s look at some creative ways to expand your beef cooking skills.
Other Cuts of Beef to Try
Other affordable beef cuts can be just as tasty as chuck roast. Bottom round roast is leaner and tender when slow-cooked. It cooks about 30 minutes faster than chuck roast.
Beef brisket is another great choice. It needs slow cooking for about 1 hour per pound at 300°F. The result is tender meat with rich flavor.
Short ribs are rich and indulgent. They take 2-3 hours to braise. The bones add great flavor to your sauce.
| Cut | Cooking Time Adjustment | Best Cooking Method | Flavor Profile |
|---|---|---|---|
| Bottom Round | 30 minutes less than chuck | Braising or slow cooking | Leaner, milder beef flavor |
| Brisket | 1 hour per pound | Slow roasting or smoking | Rich, intense beef flavor |
| Short Ribs | 2-3 hours total | Braising | Deep, robust, slightly sweet |
Fun Marinades and Rubs
Try these flavor-packed marinades and rubs to make your beef dishes stand out. A coffee-based rub is a great choice. It combines ground coffee, brown sugar, paprika, and garlic powder for a delicious crust.
Herb-infused olive oil marinades tenderize tougher cuts. Mix olive oil with rosemary, thyme, sage, and garlic. Let it marinate for at least 4 hours for the best flavor.
Citrus-based marinades add flavor and tenderize the meat. Use orange and lemon juice, olive oil, soy sauce, and honey. The acidity tenderizes the meat while adding bright flavors.
The secret to a great marinade is balance—acid for tenderizing, oil for moisture, salt for penetration, and aromatics for flavor. This formula works for everything from chuck roast to prime rib.
Cooking with Vegetables and Fruits
Vegetables and fruits can greatly enhance your beef dishes. Root vegetables like carrots, potatoes, and onions soak up the beef flavors. Try adding parsnips and turnips for a unique twist.
Fruits can add memorable flavors. Diced apples in the last hour of cooking add sweetness. Dried cranberries or apricots add tangy-sweet notes.
For a fancy twist, add halved red grapes in the last 30 minutes. They add juicy sweetness that balances the meat.
- Spring variation: Add 1 cup fresh peas and 2 tablespoons chopped mint in the final 15 minutes
- Summer option: Include 2 cups cherry tomatoes and fresh basil for bright flavors
- Fall favorite: Mix in 2 cups butternut squash cubes and 1 teaspoon cinnamon
- Winter warmer: Add 1 cup dried fruits rehydrated in ½ cup red wine
These ideas build on your chuck roast skills. By trying different cuts, seasonings, and ingredients, you’ll create dishes that everyone will love.
Conclusion: The Joy of Cooking Chuck Roast
Learning to make the perfect chuck roast recipe is incredibly rewarding. This simple beef cut turns into a meal that warms your heart and fills your belly. It’s all about the care and patience you put into it.
Building Your Cooking Confidence
Mastering chuck roast is more than just a recipe. It teaches you essential cooking skills. You learn to sear meat, balance flavors, and understand how tough cuts become tender with slow cooking. These skills are key to making many classic dishes.
Every time you cook this dish, you get better. You develop a sense of cooking that will help you in the kitchen for years to come.
Enjoying Your Chuck Roast Meal
Take your time to enjoy your meal. A well-made pot roast is meant to be savored. Notice the tender meat, the rich gravy, and how the veggies soak up the beef’s flavor. Present it on a big platter with veggies around the meat for a cozy look.
Sharing Your Cooking Success Stories
Chuck roast recipes are often family traditions. The smell of a pot roast cooking all day brings people together. It’s not uncommon for your chuck roast to become the go-to dish for family gatherings or Sunday dinners.
With the tips and variations we’ve covered, you’re ready to create your own signature chuck roast recipe. This dish is special because it’s easy to make yet full of flavor. Trust your taste, adjust as needed, and enjoy making this classic dish your own.
FAQ
How do I know when my chuck roast is done?
Can I use frozen chuck roast?
How do I adjust the cooking time for larger roasts?
Why is my chuck roast tough even after long cooking?
Should I brown my chuck roast before slow cooking?
What’s the best cut of chuck roast to buy?
How do I make my chuck roast gravy less greasy?
Can I make chuck roast ahead of time for a party?
What’s the difference between pot roast and chuck roast?
How do I fix a chuck roast that’s too salty?
For more cooking tips, stay connected with us. We also recommend the cookbook Skinnytaste Simple: Easy, Healthy Recipes with 7 Ingredients or Fewer
For more Recipes about Beef?
Did You try our recipe ?
There are no reviews yet. Be the first one to write one.