Your 1 inch steak cook time Guide: Perfect Results
Table of Contents
Your 1 inch steak cook time Guide: Perfect Results
There’s nothing worse than slicing into a beautifully marbled cut of meat, only to find it’s overcooked or unevenly seared. We’ve all been there—standing at the grill or stove, hoping for that ideal balance of a crispy crust and tender, juicy center. But getting it just right? That’s where precision matters.
This guide is your roadmap to nailing every detail. Whether you’re grilling outdoors or using a cast-iron pan indoors, timing and temperature are your secret weapons. You’ll learn why pre-heating your cooking surface matters, how a meat thermometer eliminates guesswork, and why letting your steak rest transforms good results into restaurant-quality perfection.
We’ve distilled insights from top culinary sources to simplify the process. Discover recommended heat levels for rare, medium, or well-done outcomes—and avoid common pitfalls that leave meat dry or undercooked. By the end, you’ll confidently handle any cut, turning weeknight dinners into moments worth savoring.
Key Takeaways
- Pre-heating your grill or pan ensures even searing and locks in flavor.
- Use a meat thermometer to hit precise doneness levels every time.
- Thicker cuts require adjusted cooking times to avoid overcooking the center.
- Resting meat after cooking redistributes juices for maximum tenderness.
- Different methods (grill vs. pan) impact cooking duration and crust development.
Getting Started: Prepping Your Steak for Optimal Results
The journey to a flawless meal begins long before the sizzle hits the pan. Proper preparation ensures every bite delivers the texture and flavor you crave. Let’s break down the non-negotiable steps that set the stage for success.
Bringing Your Steak to Room Temperature
Cold meat straight from the fridge cooks unevenly, leaving you with a charred exterior and underdone center. Letting it rest for 30–45 minutes allows heat to penetrate uniformly. This simple step reduces drastic temperature shifts during grilling or pan-searing.
Pat the surface dry with paper towels before seasoning. Moisture steams instead of searing, robbing you of that golden crust. Sprinkle salt and pepper generously—it’s the foundation for depth of flavor.
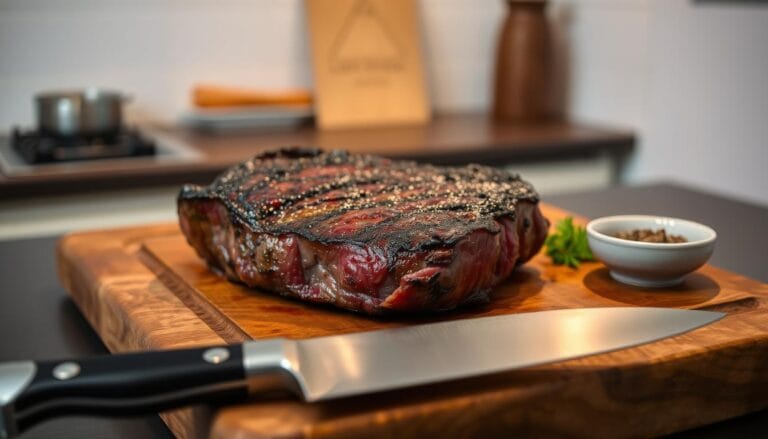
Understanding Steak Thickness and Quality
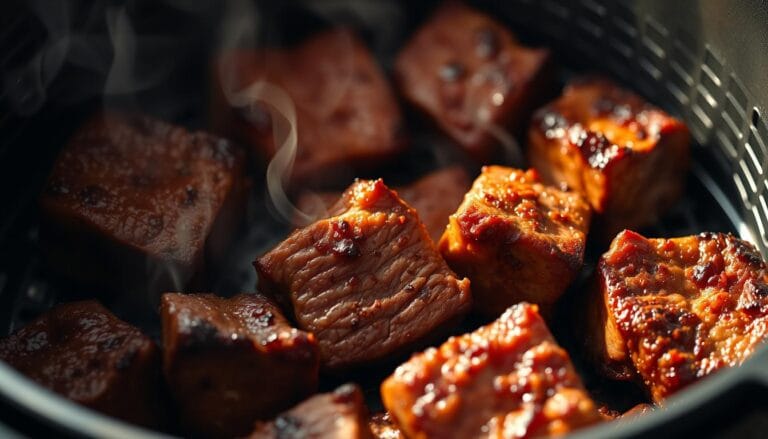
Thicker cuts demand adjusted cooking times to avoid overcooking the edges while waiting for the center to reach doneness. A 1-inch piece might need 4–5 minutes per side, but always verify with a thermometer.
When selecting meat, look for:
- Bright red color with creamy marbling (fat distribution matters)
- Firm texture that springs back when pressed lightly
- Minimal liquid in the packaging, indicating freshness
Quality matters whether you’re preparing classic cuts or experimenting with quality protein pairings. Investing in better-grade meat elevates results dramatically.
Understanding 1 inch steak cook time
Mastering the art of preparing a juicy cut requires more than just timing—it’s about understanding variables that influence every sizzle. Let’s explore how subtle differences in technique and tools shape your results.
Factors Impacting Cooking Times
Marbling, thickness variations, and heat source type all play critical roles. A piece with rich fat distribution cooks differently than leaner options—the fat melts slowly, basting the meat internally. Even slight differences in thickness (like 0.9″ vs 1.1″) can alter outcomes by 15-20%.
Grills often run hotter than pans, while ovens provide indirect heat. “High heat sears faster but demands vigilance,” notes Chef Michael Sullivan. “Gas offers control; charcoal adds flavor complexity.”
Temperature and Doneness Fundamentals
Internal readings trump guesswork. Here’s a quick reference:
| Doneness | Internal Temp (°F) | Visual Clues |
|---|---|---|
| Rare | 120-125 | Bright red center, soft texture |
| Medium-Rare | 130-135 | Warm pink core, slight firmness |
| Medium | 140-145 | Light pink middle, defined crust |
Letting meat reach room temperature before cooking reduces active cooking duration by 2-3 minutes per side. Always factor in carryover heat—your protein’s temp rises 5°F while resting.
Essential Tools and Techniques for Perfect Steak
Your toolkit determines the difference between a good meal and a masterpiece. While premium cuts matter, the right equipment unlocks their full potential. Let’s explore the non-negotiable items every home chef needs.
Mastering Precision With a Meat Thermometer
Guesswork ruins meals. Insert the probe into the thickest part of your protein, avoiding bones or fat pockets. Chef Elena Rodriguez advises: “Pull cuts 3-5°F below target temp—residual heat finishes the job.”
Digital models like OXO’s Grill Thermometer deliver instant readings. Check frequently during the final minutes—overcooking happens fast. Use this quick reference:
| Doneness | Pull Temp |
|---|---|
| Medium-Rare | 130°F |
| Medium | 135°F |
| Well-Done | 145°F |
Choosing Your Cooking Powerhouse
Each method shapes flavor differently:
- Grills impart smoky depth—ideal for ribeyes or New York strips
- Cast-iron pans create crusts faster—perfect for quick weeknight dinners
- Ovens ensure even doneness for thicker cuts like tomahawks
Stainless steel tongs and heavy-duty gloves (like OXO’s grill set) prevent accidents. Match your tools to your goals—charcoal for boldness, gas for control, pans for speed.
Quality gear transforms effort into artistry. With precise monitoring and the right heat source, you’ll achieve textures and flavors worthy of a steakhouse.
Grilling Techniques and Temperature Guidelines
The sizzle of meat hitting the grill marks the start of a culinary dance between heat and flavor. Whether you crave smoky depth or precise control, your approach shapes every bite. Let’s break down how to harness your equipment for mouthwatering results.

Gas vs. Charcoal: What You Need to Know
Gas grills offer instant temperature adjustments and even heating—ideal for beginners. You’ll spend less time managing flames and more time perfecting crusts. But charcoal enthusiasts swear by its bold, smoky essence. “Lump charcoal burns hotter and cleaner,” says pitmaster Lisa Tanaka. “It’s worth the extra effort for flavor alone.”
Key differences:
- Gas: Consistent 450–500°F heat, 3–4 minutes per side for medium-rare
- Charcoal: Flare-ups create charred edges; rotate cuts every 2 minutes
Managing Grill Heat for a Perfect Sear
Preheat your grates until they scorch a drop of water in seconds. For 1-inch cuts, aim for:
| Doneness | Total Grill Time |
|---|---|
| Rare | 6–8 minutes |
| Medium | 10–12 minutes |
Flip when juices pool on the surface—about 60% through cooking. Grill marks should form a crosshatch pattern before turning. Compared to pans, open grills dry the exterior faster, creating crispier edges. Adjust vents on charcoal models to maintain steady airflow.
Experiment with dual-zone setups: sear over direct heat, then finish indirectly. Your ideal balance of crust and tenderness awaits with practice.
Cooking Steak on the Stove and in the Oven
Not every kitchen has space for outdoor equipment, but that shouldn’t limit your ability to create restaurant-worthy results. Indoor methods offer precision and convenience, especially when mastering high-heat searing and controlled finishing.
Searing on High Heat and Broiling Strategies
Start with a cast-iron skillet heated until smoking—this creates the Maillard reaction for that crave-worthy crust. Sear each side for 2–3 minutes, pressing gently to ensure even contact. Transfer to a preheated oven (400°F) for 4–6 minutes to finish.
Chef Marco Torres notes: “A heavy pan retains heat better than thin cookware. Pair it with an oven-safe thermometer for seamless transitions.” Broiling works similarly but requires flipping every 90 seconds to prevent charring.
| Method | Searing Time | Oven Temp | Total Duration |
|---|---|---|---|
| Stove-to-Oven | 3 min/side | 400°F | 10–12 minutes |
| Broiler-Only | N/A | High | 8–10 minutes |
Adjusting Cooking Times for Desired Doneness
Thicker cuts need longer oven time but shorter searing to avoid burning. For medium-rare, pull meat at 125°F—it’ll rise to 130°F while resting. Use this guide:
| Doneness | Internal Temp | Oven Time |
|---|---|---|
| Rare | 120°F | 3–4 minutes |
| Medium | 135°F | 6–8 minutes |
Carry-over heat adds 5–7°F, so factor this into your timing. If the crust darkens too quickly, reduce stovetop heat slightly. Always let your protein rest 5 minutes before slicing.
Mastering Doneness: Testing and Resting for Flavor
Perfecting your meal’s finish requires knowing when to stop cooking and when to let it breathe. Two trusted methods—the tactile finger test and digital precision—help you hit the sweet spot between underdone and overdone. Combine these with proper resting, and you’ll unlock flavors that stay on your plate instead of pooling beneath it.

Finger Test Versus Instant-Read Thermometer
The finger method uses your hand’s palm as a reference. Gently press the fleshy area below your thumb:
- Rare: Soft, like touching your relaxed palm
- Medium: Springy, similar to the base of your thumb when fingers are spread
- Well-Done: Firm, matching the tension when thumb and pinky touch
While intuitive, this approach varies with cuts and experience. Chef Amanda Lee advises: “Use it for quick checks, but pair it with a thermometer for accuracy.”
Digital tools remove doubt. Insert the probe horizontally into the thickest part, avoiding bones. Compare readings to this guide:
| Doneness | Temperature | Finger Test Match |
|---|---|---|
| Rare | 120-125°F | Relaxed palm |
| Medium | 135-145°F | Spread hand |
The Importance of Resting Your Steak
Resting lets muscle fibers relax, reabsorbing up to 20% of expelled juices. Skip this step, and you’ll lose moisture with the first cut. For most cuts, 5-7 minutes under foil works. Thicker pieces need 10 minutes.
Carry-over cooking adds 3-5°F during rest. Pull meat 3°F below your target temp. Use this window to prepare sides or sauces.
| Cut Thickness | Rest Time |
|---|---|
| 1″ | 5 minutes |
| 1.5″ | 8-10 minutes |
Avoid slicing early—those precious minutes transform good results into greatness.
Expert Tips for Consistent, Perfect Steak Results
Even seasoned home chefs can stumble when rushing through key steps. Small oversights—like skipping prep work or misjudging heat levels—lead to inconsistent outcomes. These strategies from industry professionals will help you sidestep pitfalls and elevate your technique.
Avoiding Common Cooking Mistakes
Flipping meat too often prevents proper crust formation. Let it sear undisturbed for at least 2 minutes per side. Many also forget to preheat pans or grills thoroughly, causing uneven doneness. “A cold surface steams instead of sears,” warns Food52 contributor Sarah Jampel.
Over-reliance on visual cues leads to guesswork. Invest in a digital thermometer—63% of undercooked meals result from ignoring internal temperatures. Thicker cuts? Reduce heat after searing to prevent burnt exteriors.
Pro Insights from Grilling and Culinary Experts
Chef Michael Symon recommends salting meat 40 minutes before cooking: “It draws out moisture, then reabsorbs with seasoning for deeper flavor.” For charcoal enthusiasts, The Spruce Eats suggests adding wood chips during the last 3 minutes to infuse smoky notes without bitterness.
Adjust methods based on protein type. Lean cuts like filet mignon thrive in butter-basting pans, while ribeyes shine on high-heat grills. Always tent with foil during resting—this preserves 15-20% more juices compared to uncovered meat.
“Consistency comes from controlling variables. Track grill temps hourly and rotate cuts if your heat source has hot spots.”
Conclusion
Transforming your kitchen into a steakhouse-caliber experience comes down to three essentials: proper prep, heat control, and patience. You’ve learned how room-temperature meat ensures even cooking, why searing demands blistering surfaces, and how resting preserves those precious juices.
Never underestimate the power of an internal temperature check—it’s your safeguard against guesswork. Pair this with letting your protein rest for at least five minutes, and you’ll lock in tenderness that rivals top restaurants.
From selecting marbled cuts to nailing doneness through the finger test or digital tools, every step builds toward mastery. Whether using a cast-iron pan or firing up the grill, consistency comes from trusting the process.
Bookmark this guide for your next culinary adventure. Share your triumphs with friends, and remember: great cooking blends tradition with innovation. Your journey to the perfect steak starts now—one sizzling sear at a time.
FAQ
Why is bringing steak to room temperature important before cooking?
How does thickness impact grilling or pan-searing?
What’s the most reliable way to check doneness?
Gas vs. charcoal grills: which is better for searing?
Should you rest meat after cooking, and for how long?
What common mistakes ruin a good cut?
Can you achieve restaurant-quality results in a home oven?
How do you adjust times for different doneness levels?
For more cooking tips, stay connected with us. We also recommend the cookbook Skinnytaste Simple: Easy, Healthy Recipes with 7 Ingredients or Fewer
For more Recipes about Beef?
Did You try our recipe ?
There are no reviews yet. Be the first one to write one.